Left Continue shopping
Your Order

You have no items in your cart

Promotion
Read more
Explore endless possibilities with Auzz Trinklets N Krafts
Currency

Blog / Hero Arts

DT Teresa - All About The Men 2

Hello Everyone! 
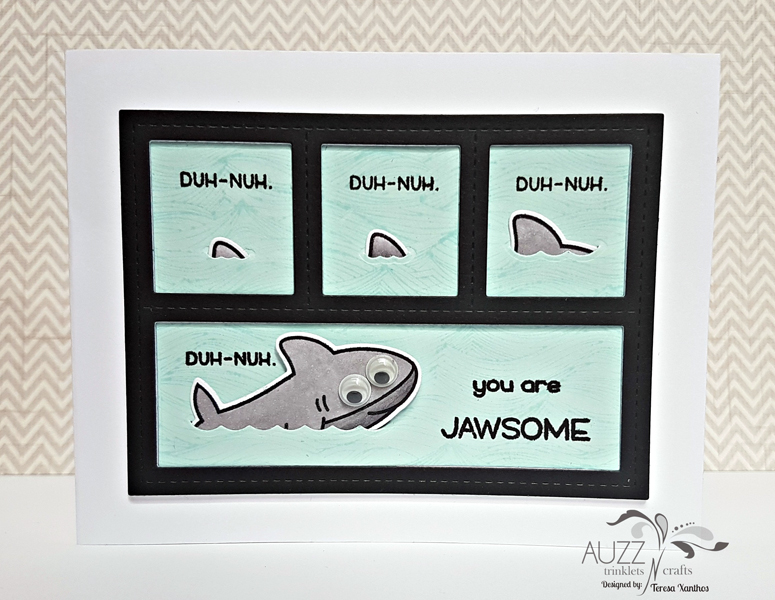
Today I have another card "All About the Men" to share with you. This card uses Neenah Classic Crest 110# Smooth Solar White Cardstock for the base which is cut with a paper trimmer at 4 1/4" x 11" and scored with a teflon bone folder at 5 1/2" to make a side folding card of 5 1/2" x 4 1/4".
I die cut four white frames from My Favorite Things Blueprints 27with a Sizzix Big Shot Machine from Neenah Classic Crest 80# Smooth Solar White Cardstock and one black cardstock frame to form a stacked layer and adhered this with Ranger Multi Medium Matte to the centre of the card front. I used the same die to die cut the inserts of the frame from Simon Says Stamp Seaglass cardstock. I placed these pieces in a MISTI and stamped them with the Hero Arts Waves Background stamp in My Favorite Things Berrylicious Hybrid Ink. I stamped the sentiments in onto each piece, using Versafine Onyx Black ink and then die cut the varying size waves into each piece with Lawn Fawn Ocean Wave Accents. I tucked the images from Lawn Fawn Duh-Nuh into these die cut waves after stamping them in Memento Tuxedo Black ink and colouring them with Copic Markers on X-Press It Blending card.
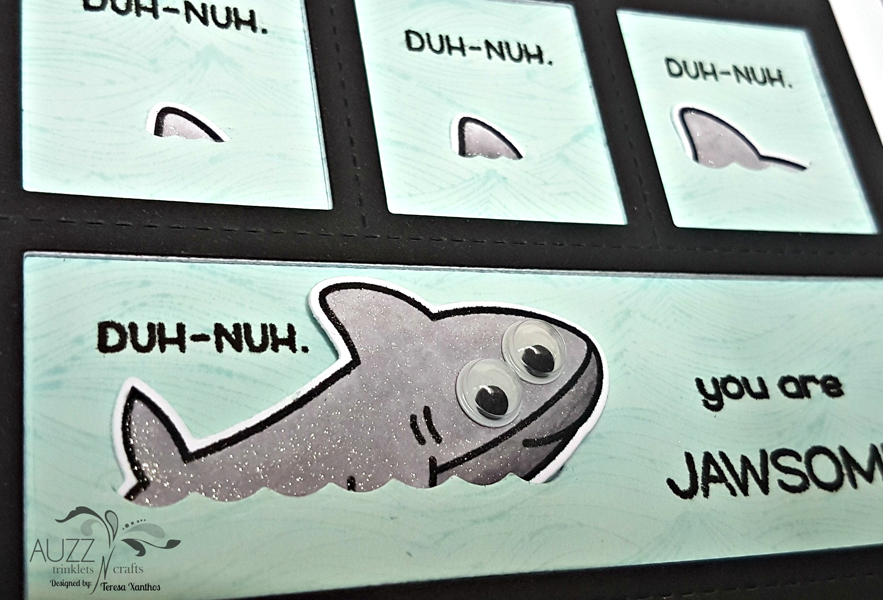
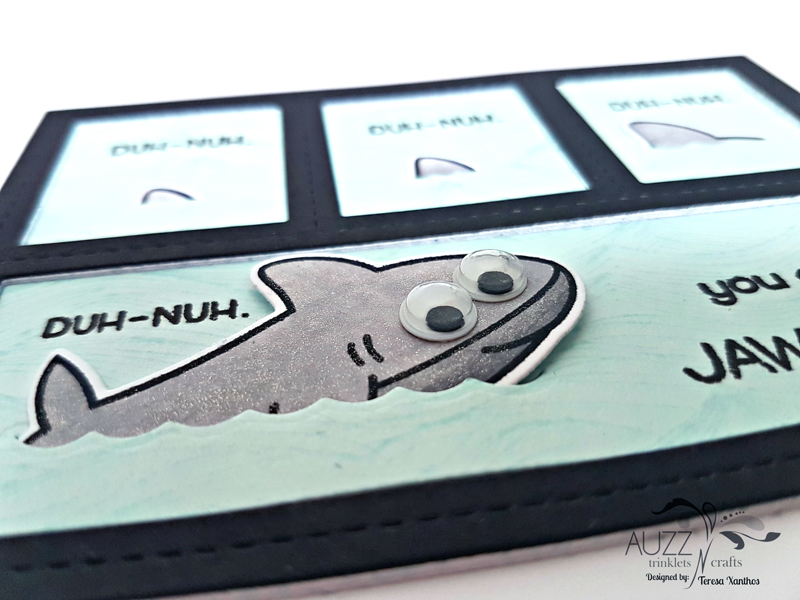
I placed each piece into the frame and propped up the head of the shark with a little 3M Scotch Double Sided Foam Tape. The googly eyesfrom my stash were then adhered and I swirled some Zig Wink of Stella, Clear onto all the shark images to complete this comic strip style card.
Thankyou for following along with me today. If you cannot find the items I have used (listed below) in the Auzz Trinklets and Crafts store, be sure to drop Neha a message via email or Facebook and she will do what she can to order the product in for you.
Happy crafting and have a great day!
Teresa
Products Used:
My Favorite Things Blueprints 27 Sizzix Big Shot Machine Neenah Classic Crest 80# Smooth Solar White Cardstock Black Cardstock Ranger Multi Medium Matte Simon Says Stamp 100lb Cardstock - Seaglass Misti Stamping Tool Hero Arts Waves Background stamp My Favorite Things Berrylicious Hybrid Ink Versafine Onyx Black Ink Lawn Fawn Ocean Wave Accents Lawn Fawn Duh-Nuh Memento Tuxedo Black Ink Copic Markers - N0, N2, N4, N5 X-Press It Blending card
3M Scotch Double Sided Foam Tape
Googly eyes
Zig Wink of Stella, Clear
Read more

DT Teresa - Stencils 2

Hi Everyone!
Today I am sharing another card using a stencil, our theme for this month of June.
This card uses Neenah Classic Crest 110lb Smooth Solar White Cardstock for the base which is cut with a paper trimmer at 4 1/4" x 11" and scored with a teflon bone folder at 5 1/2" to make a top folding card of 5 1/2" x 4 1/4".
I started by taping down a piece of Neenah Classic Crest 110lb Smooth Solar White Cardstock cut at 4 1/4" x 5 1/2" to my work surface withmasking tape to keep in place while I worked (but could be easily removed when finished) and taped down a 6" x 6" Crafter's Workshop stencil Tiny Circles over the top of the cardstock.
I mixed together in a bowl a small amount of Wendy Vecchi Embossing Paste in white with a few drops of Distress Ink in Lucky Clover from a refill bottle and some emerald green glitter. I then used a palette knife to evenly apply the paste to the stencil. Once covered, I removed the stencil and immediately placed it into a basin of soapy water to be washed off later and set the stenciled cardstock aside to dry.
The beautiful image was created using Hero Arts Color Layering Peacock. The peacock was stamped with different colours of Hero Arts mid-tone Shadow Ink. The solid body was stamped with Pool, the tail with Emerald Green, the layered feathers on the body and tail and the legs in Navy and the eyes in the tail and beak were stamped with Lemon Yellow. I diecut the peacock and set it aside.
I then used Tumbled Glass Distress Ink with an ink blending toolto add colour to a piece of Neenah Classic Crest 80lb Solar White Cardstock and diecut it with the rectangle die from My Favorite Things Blueprints 21 and adhered it to the card base with Kokuyo Glue Tape Roller.
Once the stenciled cardstock piece was dry, I diecut a circle from it with a Spellbinders Nestabilities Classic Circles die. I used Simon Says Stamp Cardstock Soft Navy to diecut a circle only marginally larger to tuck behind the stenciled circle piece and adhered both to the cardfront.
The sentiment from Hero Arts Color Layering Poppy was cut apart and positioned to stamp in Hero Arts mid-tone Shadow Ink, Navy, with a Misti Stamping Tool onto a strip of cardstock, along with flourishes from the Hero Arts Color Layering Peacock stamp set.
I diecut multiple copies of the peacock shape and glued them as a stack to create a chipboard-type piece and placed the stamped image on top. I then stuck the sentiment piece to the card and glued the peacock on top before brushing A Wink of Stella, Clear, onto each of the yellow areas for some shimmer.
Thankyou for following along with me today. Please feel free to ask questions if anything needs clarifying. If you cannot find the items I have used (listed below) in the Auzz Trinklets and Crafts store, be sure to drop Neha a message via email or Facebook and she will do what she can to order the product in for you.
Happy crafting and have a great day!
Teresa
Products Used:
Neenah Classic Crest 110lb Smooth Solar White Cardstock
Paper trimmer
Teflon Bone Folder
Masking tape
Wendy Vecchi Embossing Paste, white
Glitter, green
Palette knife
Hero Arts mid-tone Shadow Ink - Pool, Emerald Green, Navy, Lemon Yellow
Tumbled Glass Distress Ink
Kokuyo Glue Tape Roller
Spellbinders Nestabilities Classic Circles, Large
Simon Says Stamp Cardstock Soft Navy
Hero Arts Color Layering Poppy
Misti Stamping Tool
Zig A Wink of Stella marker, Clear
Read more

DT Teresa - Shabby Chic 2

Hello!
I have another shabby chic project to share with you today, catching up now!
This card uses Neenah Classic Crest 110lb Smooth Solar White Cardstock for the base which is cut with a paper trimmer at 4 1/4" x 11" and scored with a teflon bone folder at 5 1/2" to make a top folding card of 5 1/2" x 4 1/4".
I used the scalloped frame from My Favorite Things Blueprints 20to place on the card base, moving it slightly above the fold of the card to create a top folding scalloped base card once it was run through theSizzix Bigshot. I then used the same frame die to cut a piece from Simon Says Stamp cardstock in Audrey Blue and adhered this to the partially scalloped card base. This covered the top fold of the card base - as the frame die was moved above the card base before cutting to retain the fold, the edge was flat. Using the coloured cardstock allowed the opportunity for a complete scalloped card front. Using Versamark Ink, I stamped a floral image from The Ton Fresh Cut Dahliasstamp set numerous times onto the card, providing a subtle background.
I used Neenah Classic Crest 80lb Smooth Solar White Cardstock and stamped various images from Hero arts Color Layering Bird and Branch and WPlus9 Fresh Cut Florals to create my own patterned cardstock piece. Altenew Inks provided a wonderful feminine, pastel pallet using Frosty Pink, Buttercream, Frayed Leaf and Peach Perfect. From this I cut a teapot, teapot lid and teacup from My Favorite Things Dienamics Tea Party and placed aside.
I then die cut multiple (7-8) tea pots, lids, teacups and (42-48) sugar cubes with the dies from plain white cardstock and adhered the pieces together using Ranger Multi Medium Matte to make sturdy embellishments. Before adding the top stamped piece of the tea pot lid and tea cup I cut away a small area of the plain adhered pieces with myTim Holtz scissors to allow the pieces to sit flush over the top of the teapot. I then added the top piece and glued the teapot, lid, cup and sugar cubes into place using Ranger Ink Multi Medium Matte.
After brushing over the area to be stamped with an EK Tools powder tool, the sentiment stamp from My Favorite Things Cookie Crumbs was cut apart and stamped in Versamark Ink with my MISTI stamping tool. I used Hero Arts white embossing powder for a stand out sentiment, paired with a Wagner Heat Tool.
I die cut a spoon with My Favorite Things Dienamics Tea Party from a silver foiled piece a had previously made from Heidi Swapp Minc Reactive Foil using a Heidi Swapp Minc Machine. I cut away the lower half of the spoon and placed the handle section against the top of the teacup, adhering it to the card base and giving the illusion of it sitting inside the cup.
The sugar cubes were then swiped with the wonderful Zig Wink of Stella in Clear to provide a shimmer and a sparkle! Finally, I placed some lovely fabric flowers onto the teapot. An elegant, feminine card is the result and would make a great Mother's Day card also.
Thankyou for following along with me today. Please feel free to ask questions if anything needs clarifying. If you cannot find the items I have used (listed below) in the Auzz Trinklets and Crafts store, be sure to drop Neha a message via email or Facebook and she will do what she can to order the product in for you.
Happy crafting and have a great day!
Teresa Products used: Neenah Classic Crest 110lb Smooth Solar White Cardstock
Paper trimmer
My Favorite Things Blueprints 20
Sizzix Bigshot Machine
Simon Says Stamp cardstock in Audrey Blue
Versamark Ink
Neenah Classic Crest 80lb Smooth Solar White Cardstock
Hero Arts Color Layering Bird and Branch
WPlus9 Fresh Cut Florals
My Favorite Things Cookie Crumbs
Wagner Heat Tool
Heidi Swapp Minc Machine
Zig Wink of Stella in Clear
Fabric flowers
Read more

DT Teresa - Romance 2

Hello! I hope you all enjoyed your Valentine's Day yesterday, whether or not you celebrated the day designated for love!

Today I am sharing a card that fits the bill for Romance, our theme for February here on the Auzz Trinklets and Crafts blog.

This card uses Neenah Classic Crest 110lb Smooth Solar White Cardstock for the base which is cut with a paper trimmer at 4 ¼“ x 11” and scored with a teflon bone folder at 5 ½“ to make a top folding card of 5 ½“ x 4 ¼”.
I chose My Favorite Things Cookie Crumbs and the coordinating My Favorite Things Dienamics set You're the Milk to my Cookie for this project.
I used the sprinkles/hundreds and thousands stamp meant for a cookie and stamped it multiple times onto the card base with Altenew Crisp Dye Ink in Frosty Pink.
The layered frames were die cut from Neenah Classic Crest 80lb Smooth Solar White Cardstock with Simon Says Stamp Stitched Rectangles dies. I lined up the outside die with the third largest die to create the first frame and then used the outside die with the second largest die to create the top frame and adhered them together using 3M Scotch Double Sided Foam Tape and stuck these to the card base with double sided tape.
I cut four milk bottles from Neenah Classic Crest 80lb Smooth Solar White Cardstock and glued them together to create a dimensional piece and did the same with kraft cardstock to create the cookie, using the larger of the two circular dies in the set.
My Heidi Swapp Minc machine then came into action. I foiledHeidi Swapp Minc Sheets using Heidi Swapp Reactive Foil in Light Pink, iCraft Deco Foil in Red and iCraft Deco Foil in Gold. I then used dies from the MFT set to diecut the pieces I needed from the different colours of foil using my Sizzix Big Shot machine. The heart dies came from the Sizzix dies set that coordinate with Tim Holtz's Stampers Anonymous Crazy Thingsstamp set. The foiled pieces left over, I put away for future projects. I used a shim when cutting the lid for the bottle so the debossing was a little deeper and more obvious.
I took the label for the milk bottle and heat embossed the word milkfrom the MFT stamp set using Versamark ink, Hero Arts white embossing powder and Wagner heat tool. Prior to stamping, I used an EK Success Powder Tool on the foil to prevent stray embossing powder from sticking in places I did not want it, then wiped away the powder once the embossing had cooled with a microfibre cloth. I was not sure how the foil would react to the great heat of the tool, but was happy to see that it provided an interesting effect and a wonderful texture. I think I will be using this technique again as it would be perfect for a vintage look.

I glued all the pieces together and placed them onto the card base usingRanger Multi Medium Matte before stamping and heat embossing the sentiment from the MFT stamp set with Hero Arts white embossing powder onto a strip of black cardstock which I adhered with 3M Scotch Double Sided Foam Tape. Again, I used the EK Success Powder Tool prior to stamping on the black cardstock, wiping the powder away with a microfibre cloth after the embossing was done.

I showed this to my husband once I had finished and he asked if he could write in it and give it to me. Ha!

Thankyou for following along with me today. Please feel free to ask questions if anything needs clarifying. If you cannot find the items I have used (listed below) in the Auzz Trinklets and Crafts store, be sure to drop Neha a message via email or Facebook and she will do what she can to order the product in for you.

Happy crafting and have a great day!

Products: Neenah Classic Crest 110lb Smooth Solar White Paper Paper trimmer Teflon bone folder My Favorite Things Cookie Crumbs My Favorite Things Dienamics You're the Milk to my Cookie Altenew Crisp Dye Ink in Frosty Pink Neenah Classic Crest 80lb Smooth Solar White Cardstock Simon Says Stamp Stitched Rectangles dies 3M Scotch Double Sided Foam Tape Double sided tape Kraft cardstock Heidi Swapp Minc machine Heidi Swapp Minc Sheets Heidi Swapp Reactive Foil in Light Pink iCraft Deco Foil in Red iCraft Deco Foil in Gold Sizzix Big Shot machine Sizzix/Tim Holtz dies set Crazy Things EK Success Powder Tool Versamark ink Hero Arts white embossing powder Microfibre cloth Wagner heat tool Ranger Multi Medium Matte
Read more