Left Continue shopping
Your Order

You have no items in your cart

Promotion
Read more
Explore endless possibilities with Auzz Trinklets N Krafts
Currency

Blog

Mixed media Art with Helmar Woodworking Glue

Mixed media Art with Helmar Woodworking Glue

Hello everyone,

Today I am on Helmar blog with their woodworking glue. I am falling in love with these Helmar glue.

For the past couple of weeks I have been creating this mixed media project for Helmar and I liked the way I can use this glue to stick my heavy object just like you can do with Helmar450. The glue dies clear which is plus point for any mixed media project.

Here is what I have created.

Materials to make this photo frame:

  • Clay
  • moulds of items you want make to stick on the frame
  • photo frame
  • helmar wood working glue
  • Sprays ( I have used a varity of them like shimmers, lindy's and Prims
  • Finnabar Alchemy's
  • Gold wax
  • Black gesso
  • Brushes

Steps:

  • First I used some clay and mould to get my shapes out. I left them to dry overnight.
  • Next day I arranged all pieces and stuck them with the help of Helmar Woodworking Glue
  • Once they were all stuck , I had some stone stand which I bought from a dollar shop. I stuck them all over my frame too with the help of the Helmar woodworking glue.
  • Once I have finished I leaf the frame to dry overnight.
  • Next day I went ahead and coloured everything with Black gesso
  • After the gesso was dried , I coloured and also used sprays.

Then to finish off my project I have used Inka gold to brush on top for final touches.

And this was the final result.

Hope you all like it.
Please do leave me a comment.

Thanks

neha

Read more
Altenew April 2020 Stamps/Dies/Stencils/Stamping Mat/Sequins Release Blog Hop + Giveaway

Altenew April 2020 Stamps/Dies/Stencils/Stamping Mat/Sequins Release Blog Hop + Giveaway

Hi Everyone,

Today I am so excited to be on the April release Blog hop for Altenew as a guest Designer . You have come all the way from Therese Calvird blog hope you all had fun reading and watching her blog.

Here are the cards which I have created with the upcoming new release. I am very excited to share what I have made.

So the five cards are with the April release Stamps :

Precious Blooms Stamp Set

Zig Zag Floral Stamp Set

Just Jasmine Stamp set

I have also used some of their sequins which are are releasing as well

Sequins - Satin Gold Sequins - Antique Gold Sequins - Satin White

Lets get on to the step by step details:

CARD 1:

Materials Used:

  1. Zig Zag Floral Stamp set
  2. Green Fields Ink Pad
  3. Sentiments from Just Jasmine Stamp set
  4. Neenah Solar White
  5. Shades of purple Ink pads
  6. Pocket full of shine shine ink pads
  7. Altenew Obsidian ink

Steps:

  1. For the first Step I took a A4 Neenah solar white Card stock and trim down to a size of 4.25'x 7.5' you will get two piece for this.
  2. Then on both the card stock score at 2"
  3. Now take one of the piece and stamp your flowers nearly to the edge. The layering guide can be found on the back of your stamps for the Zig Zag Florals.
  4. Once finish fussy cut out the extra piece from the bottom where the image was stamped.
  5. For the yellow part which is done on the other piece of card stock ,I have used honey Drizzle from pocket full of shine and done some blending with my Blending brush.
  6. Stick both the piece together so that the bottom yellow in underneath the stamped image.
  7. To finish of my card I have used the sentiments from the Stamp set Just Jasmine. and also placed some dew drops.

CARD 2:

Materials Used:

  1. Precious Blooms Stamp Set
  2. Green Fields Ink Pad
  3. Red Sunset Ink Pads
  4. neenah Solar White
  5. fancy thanks Die
  6. Delicate mandala die
  7. Altenew Obsidian
  8. Antique Gold Sequins

Steps:

  1. For this again I took a A4 Neenah solar white Card stock and trim down in half from Long side which gives me two piece of 4.25'x 11'
  2. Then on both the card stock score at 2" and 4" and folded and stick the middle together
  3. I also die cut out the Delicate mandala die on neenah solar white 80lbs
  4. I first stamped two times the floral image. First on Neenah Solar white and other on a masking paper. And fussy cut the masking paper one or use the dies if you have.
  5. Once I finished stamping the first floral image I covered that with the masking paper and stamped one more so that I have three flowers together .I followed the layering guide provided on the back of the stamps set. I love fussy cutting so I cut out my floral image but you can use dies to cut them out.
  6. I also stamped several leaves with Green field Ink pad and die cut them out too.
  7. For my Sentiments, I cut out three piece of Thanks from Fancy Thanks die and layered them on top of each other to give depth.
  8. I stuck the delicate mandala on one side of the card base and then used foam tape to stick my floral Image. Once done, I stuck all my leaves where I wanted.
  9. To finish of my card I have used Antique Gold Sequins.

CARD 3 and 4 :

The two cards I am explaining together because they have the similar techniques , but I have used different Colours in them.

Materials Used:

  1. Precious Blooms Stamp Set
  2. Green Fields Ink Pad
  3. lapis Ink Pads
  4. Rose Petal Ink pad
  5. Pocketful of sun shine ink pad
  6. Shades of purple ink pad
  7. Scripty Wold die 2
  8. Halftone Happy Stamp
  9. neenah Solar White for card base
  10. Strathmore Watercolour paper
  11. Altenew Obsidian
  12. Antique Gold Sequins

Steps for water Colouring: this step is for both cards and you just need to just change colours as per your requirement.

  1. Trim your watercolour card stock to 5.5 ” by 4.25” and stamps the floral image where you want using white embossing powder and versamark Ink. Use a heat tool to set.
  2. Onto a piece of masking sheet, stamp the floral images again and cut these images out, leaving a little border. Place the equivalent mask over your first stamped image and position your next stamped image. Repeat the process as in Step 1 – use embossing ink, embossing power and heat to set
  3. Do the above 1 and 2 for your leaves as well.
  4. Press out your lightest ink colour on to a glass mat and spritz with water. Load up a brush and wash this over the surface of your water colour card. Pick up more of the wash and add to the centre of your stamped image, building the colour.
  5. Take your next darkest colour ink and once again, press this on to your glass mat and spritz with water. This time, add this colour to where the darker areas would be in your design; in this case, it’s the centre of the flowers and areas that would be in shadow.
  6. Next, take your darkest ink colour, press this on to your glass mat and spritz with water. For this final layer, concentrate your colour to thevery centre of the flower and areas where there would be the most shadow. The colours from your previous layers should blend together giving a more natural effect.
  7. To make the image “pop” from the page, water down your darkest ink colour and add a shadow in the areas that would be underneath your design.

Additional Steps for Blue card:

  1. I used the sentiments from Just Jasmin
  2. I also splattered some black jet black ink pad diluted with water to add extra effects in the back ground.

Additional Steps for Happy Birthday card:

  1. I cut our Happy word from the die set Scripty Word 2 and stamped Birthday from halftone Happy Stamp set.
  2. To finish of my card I have used Antique Gold Sequins as flower centers.

CARD 5 :

Materials Used:

  1. Just Jasmin Stamp Set
  2. Cotton Candy Ink pad
  3. Cotton candy Artist Marker
  4. Fancy Thanks Die
  5. Neenah Solar White
  6. Altenew Obsidian

Steps:

  1. Take a piece of 4.25'x 5.5' neenah Solar white
  2. Place your Stamps on the cardstock to create your background with clear embossing powder and Versamark ink pad
  3. Once you are happy with your background , take your artist marker and give same shading to your flowers as you like.
  4. With the help of Blending brush and Cotton candy Ink pad, colour the whole background.
  5. Cut out a piece of Thanks from the Fancy Thanks dies and adhere them to your card.
  6. I stamped the sentiments from the Just Jasmin stamp which says "Thanks for all you Do" I trim the thanks out from the sentiment after stamping and just used the words "for all you do".

Product Links:

Please click HERE to see the links to our new products. Here is the link to the April 2020 release collection page, listing all of the new products: https://altenew.com/collections/make-a-statement-release

Prizes:

To celebrate this release, Altenew is giving away a $50 gift certificate to 6 lucky winners! Please leave a comment on the Altenew Card Blog and/or Altenew Mixed Media Blog by 4/23/2020 for a chance to win.

We’ll also draw a winner to receive a $20 gift certificate from the comments left on each designer’s blog on the blog hop list below. All winners will be announced on the Altenew blogs on 4/26/2020.

Blog Hop Order:

Altenew Card Blog

Amber Rain Davis

Terri Koszler

Laura Bassen

Jaycee Gaspar

Kelly Griglione

Jennifer McGuire

Virginia Lu

Alex Syberia

Nathalie DeSousa

Mindy Eggen

Nicole Watt

LauraJane

Laurie Willison

TaeEun Yoo

Altenew Mixed Media Blog

Emily Midgett

Norine Borys

Laura Volpes

Nicole Picadura

Tania Ahmed

Svitlana Shayevich

The Hedgehog Hollow

Ashlea Cornell

Vicky Papaioannou

Maryam Perez

Sveta Fotinia

Reiko Tsuchida

Erum Tasneem

Ivana Camdzic

Kymona Tracey

Christine Pennington

Therese Calvird

Neha Aggarwal ( YOU ARE HERE)

Lydia Evans

Hope you all had fun reading my blog. You next stop is Lydia Evans

Regards

neha

Read more

Transfer Gel Duo

Hello Everyone,

Last week I had an online craft show for which I created a video below explaining on how to use the transfer Gel duo along with stencil pal and few other foils with or without heat.

https://www.youtube.com/watch?v=L8FK1KPA9x4

I am also busy creating another video and Tutorial for another upcoming online craft show which will be held from 1st May to 4th May. So keep watching my facebook page

Transfer gel link : https://atcraft.com.au/?s=transfer+gel&post_type=product

Stencil pal: https://atcraft.com.au/?s=stencil+pal&post_type=product

Foils: https://atcraft.com.au/product-category/foil-or-vellum/

Thank you for your support.

Regards

neha

Read more
Altenew Educator "For the Love of Flowers" Blog Hop and Linky Party + Giveaway

Altenew Educator "For the Love of Flowers" Blog Hop and Linky Party + Giveaway

Hello Everyone .

Thank you for stopping by on my blog. Hope you have enjoyed reading Teri Stokes blog . Here is the List of the educators blog.

Altenew Card Blog

Michelle Ochoa Murray

Nandini Karmarkar

Terri Marie Koszler

Irina Fonina

Amy Hill

Vicki Finger

Laurel Beard

Teri Stokes

Neha Aggarwal

Nenette S. Mademoiselle

Nancy McClelland

Eva Bussom

Amber Rain Davis

Rosie Neustaedter

Patty Mello

Helen Kalb

Teri Wilson

Christine Pennington

Maryam Sharara

Nicole Watt

Virginia Lu

Now coming on to my card details .Its been such a long time since I wrote my last blog.

I am here again for another blog hop for Altenew Educators .

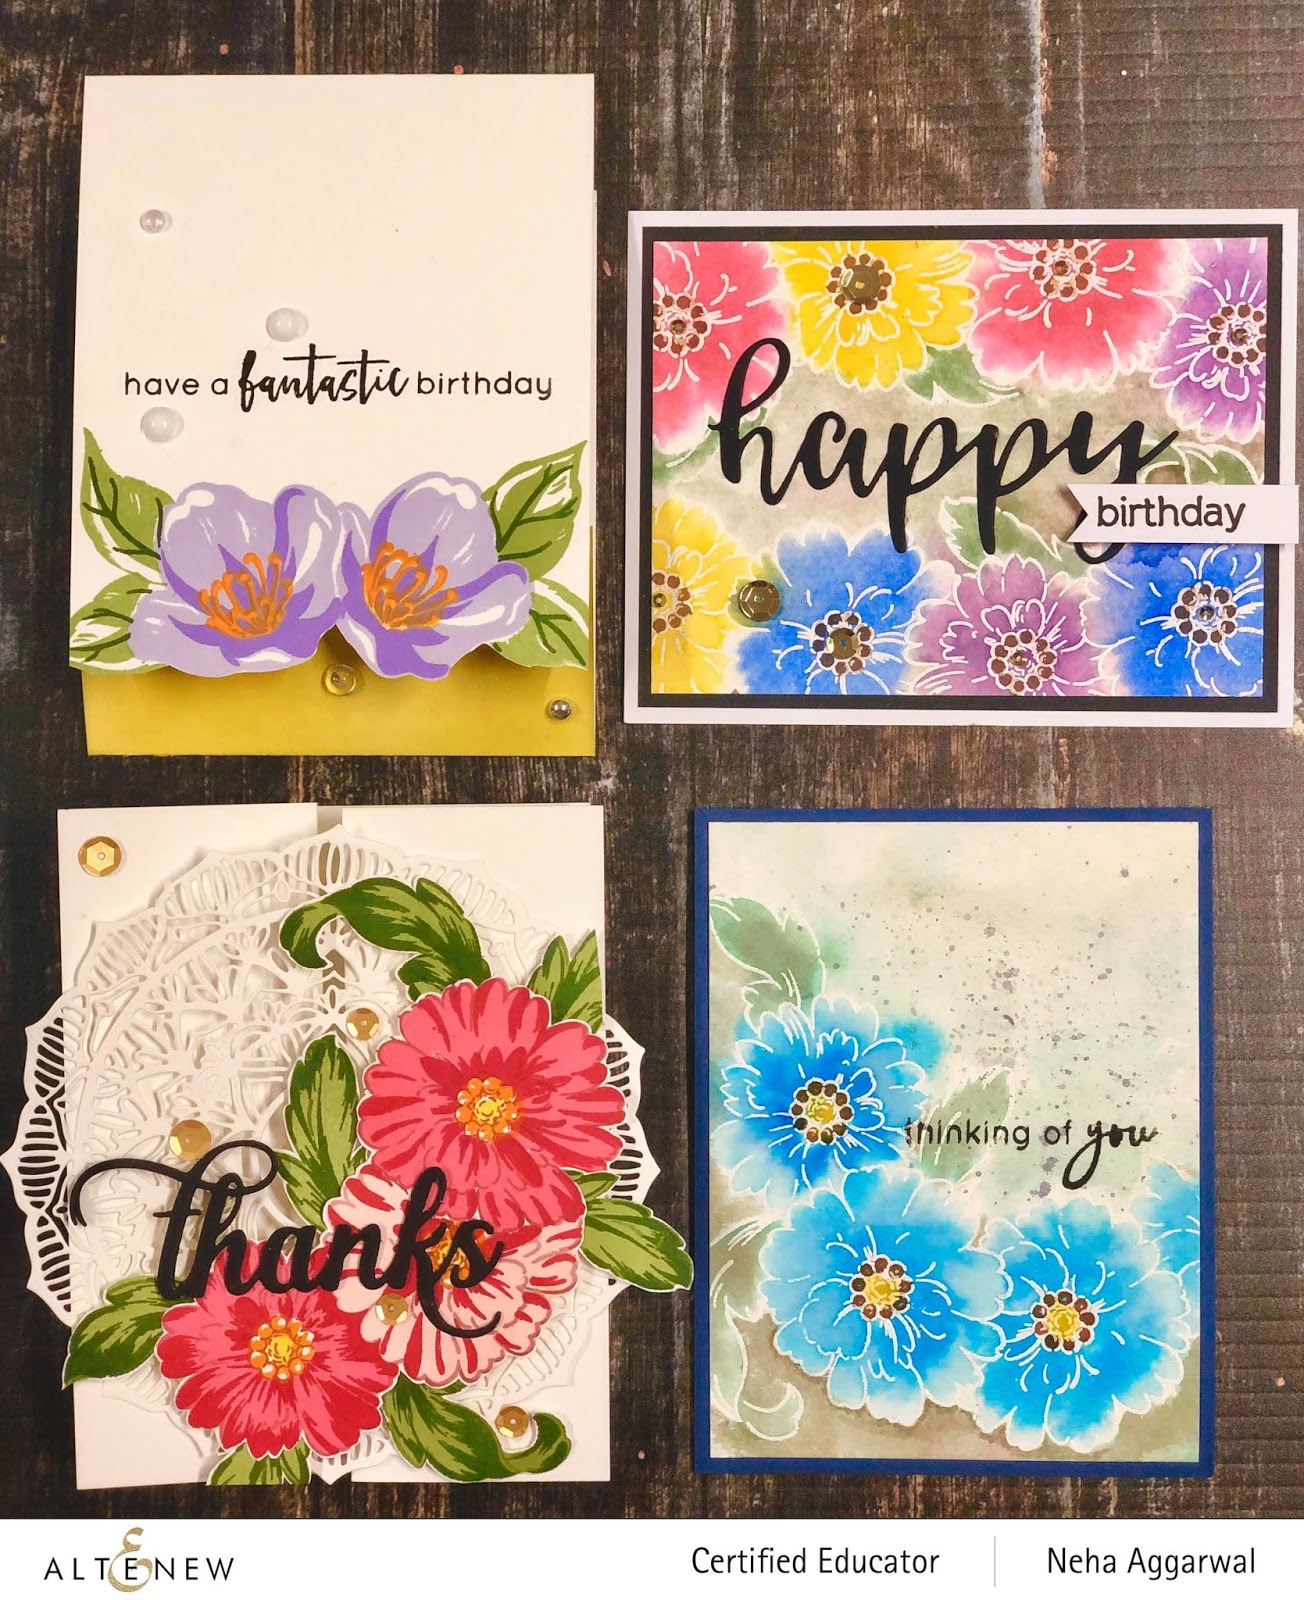
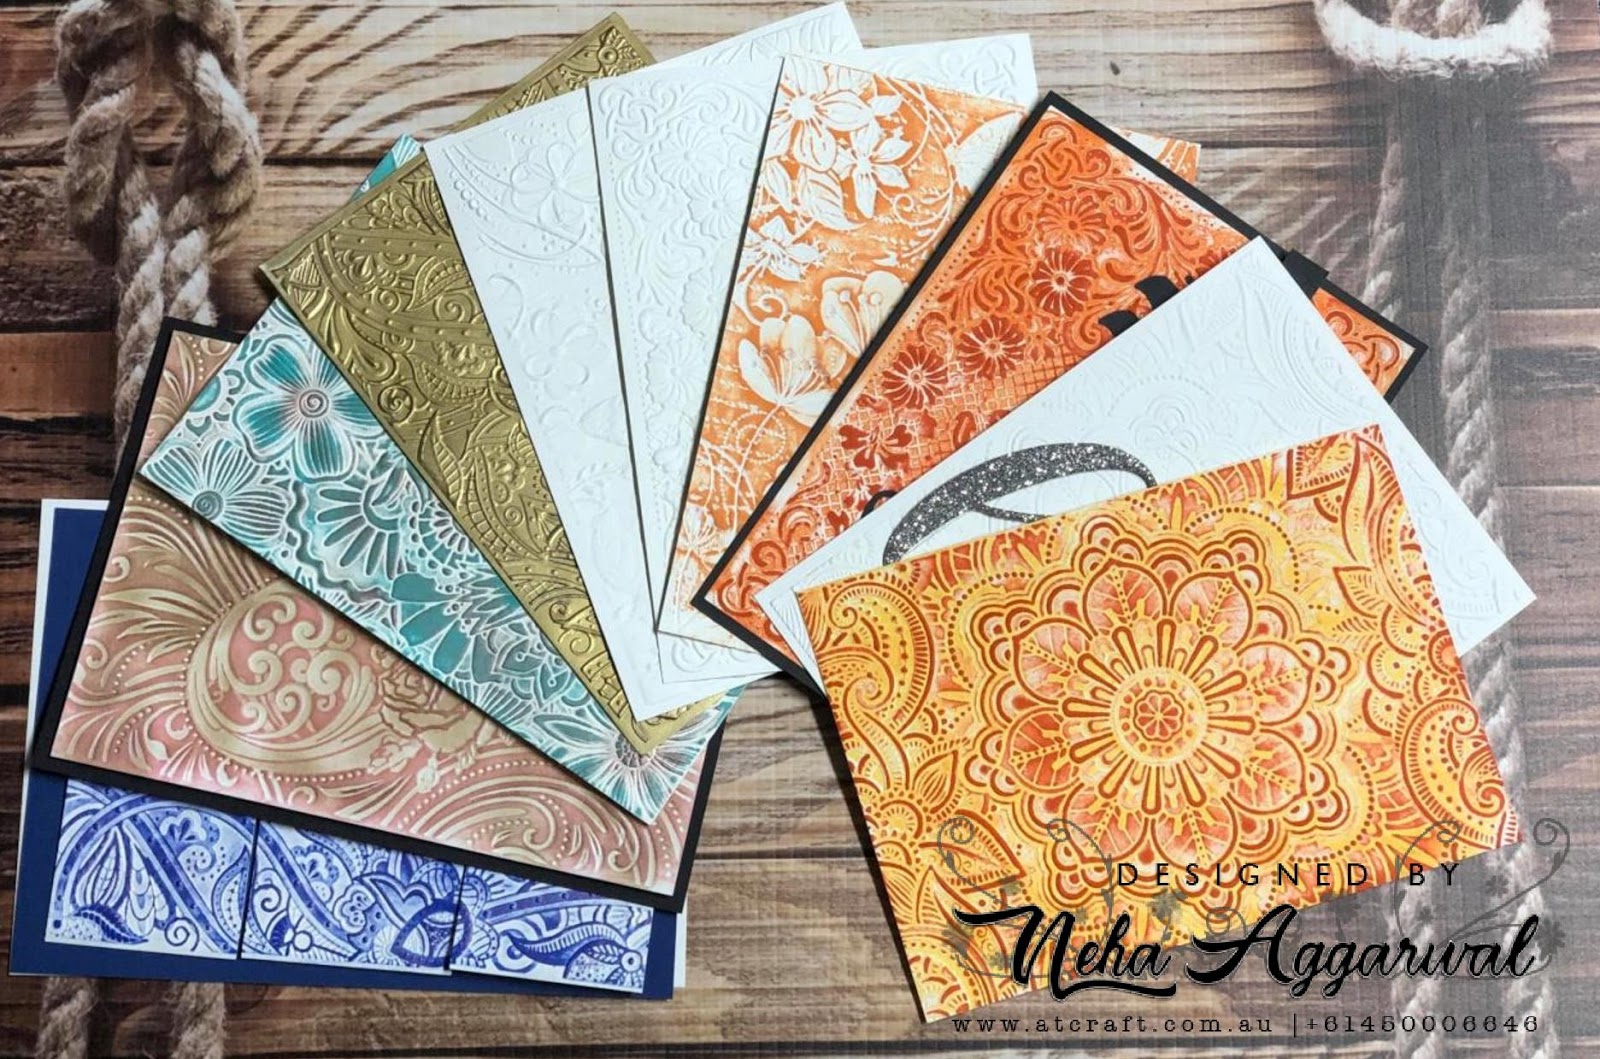
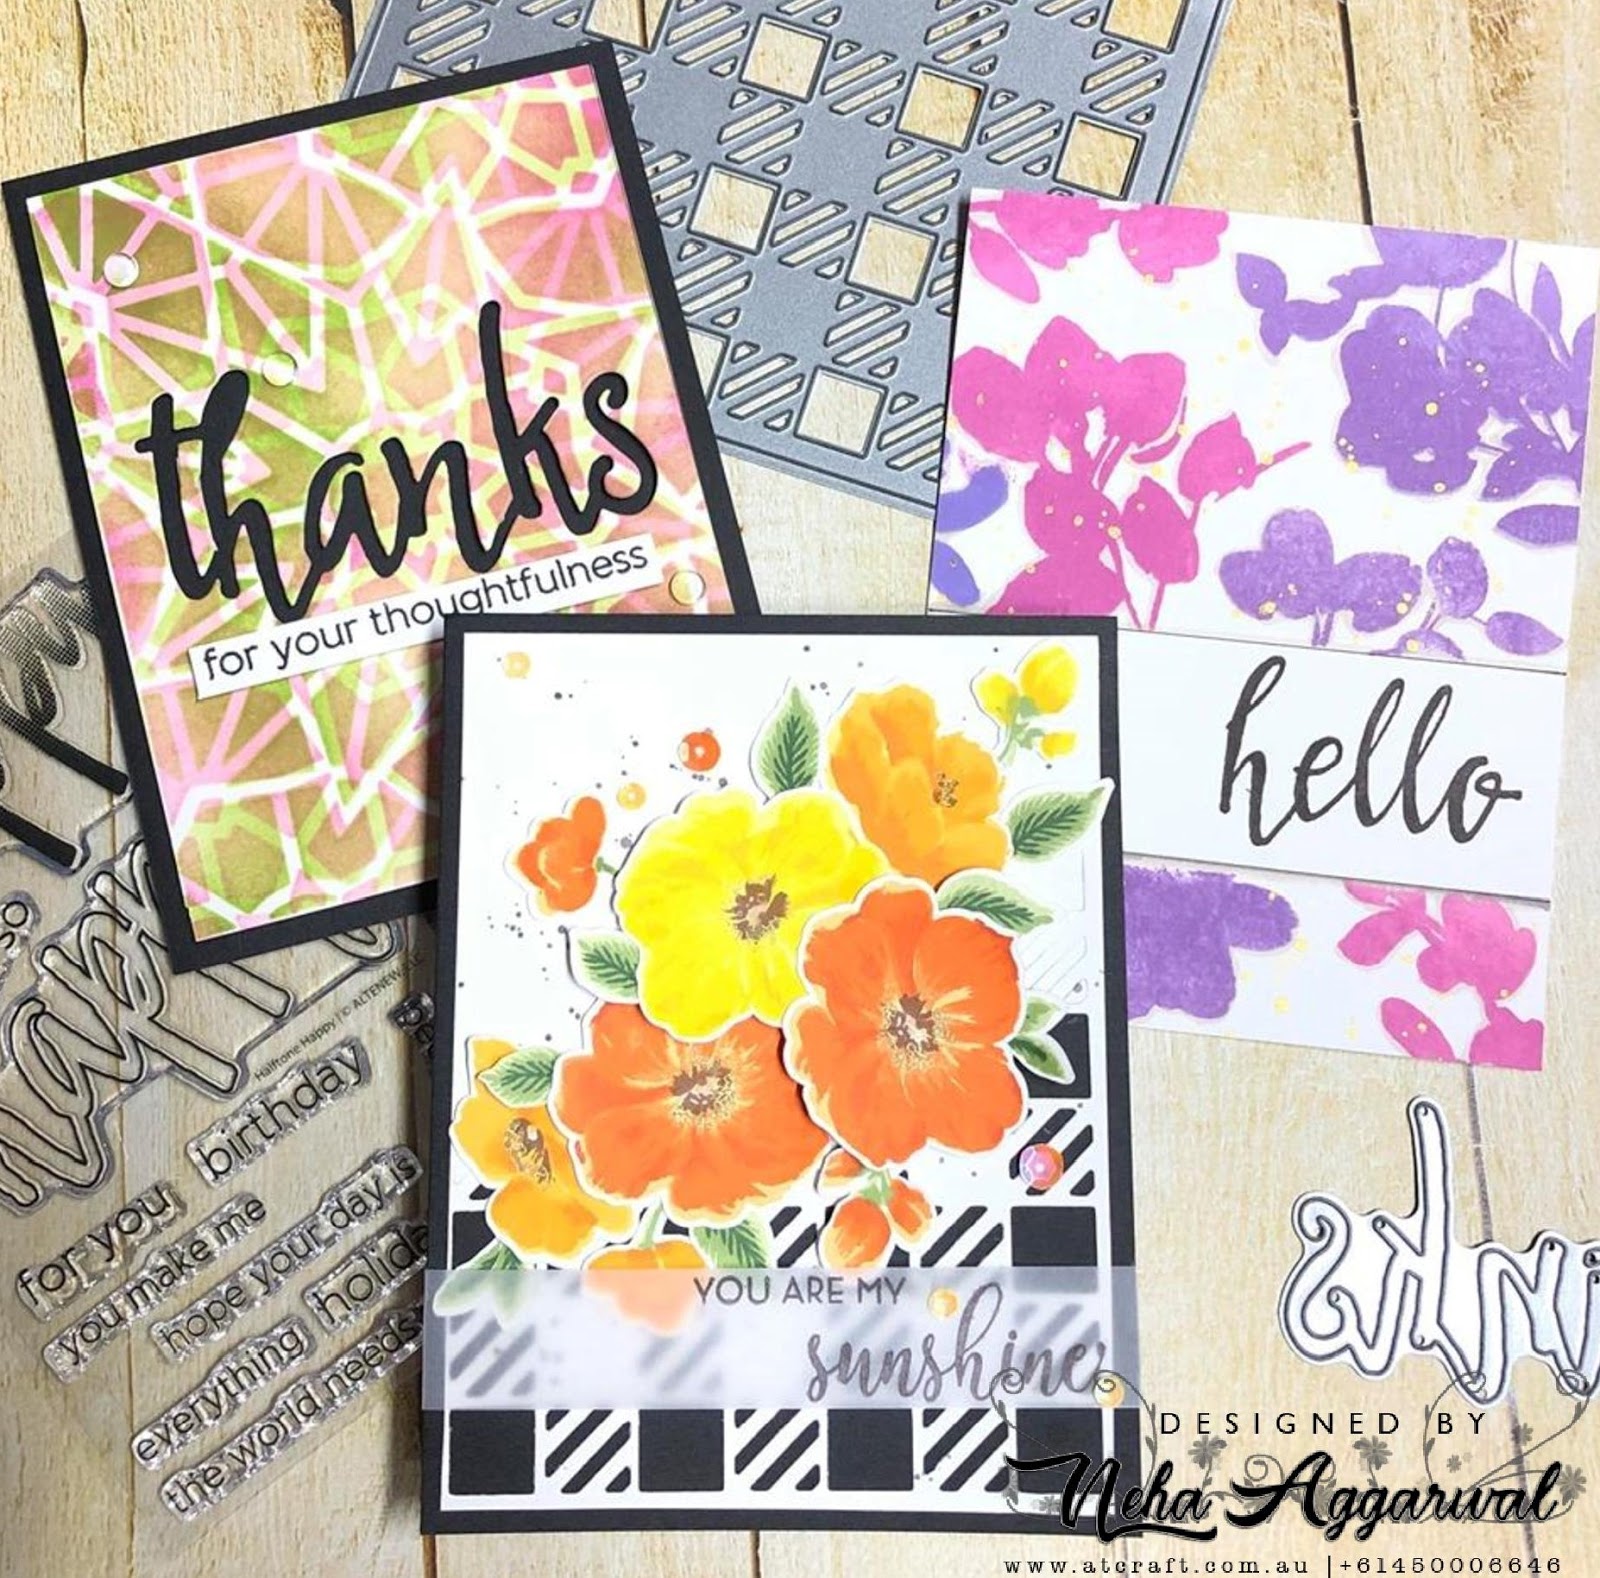
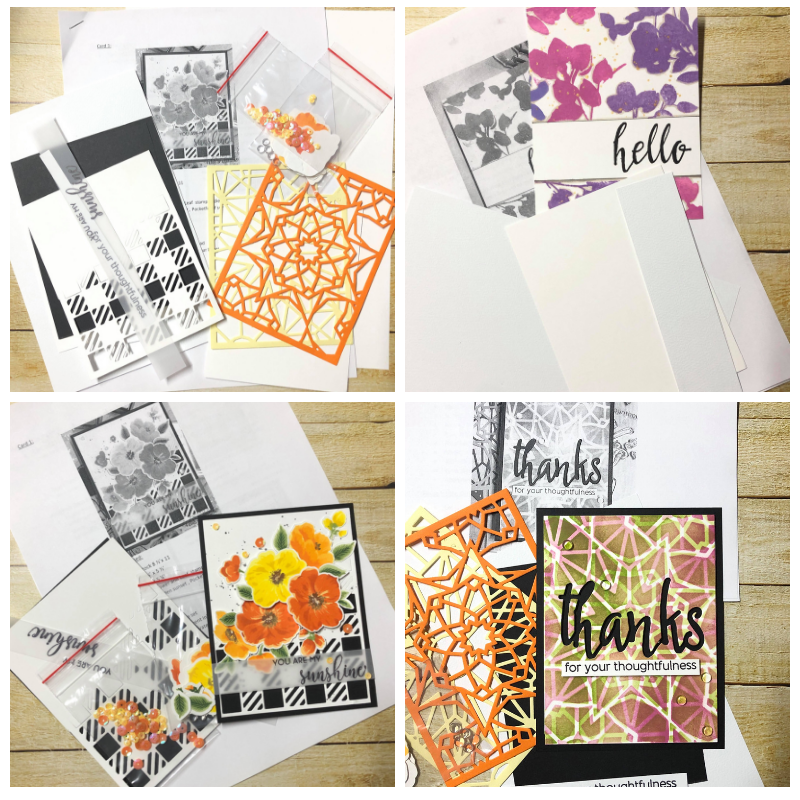
I have created two cards for my Blog hop, both using the Alcohol Artist Marker reinkers, Yupo paper and rubbing Alcohol, along with the Altenew Ink pads and stamps.

Here are two cards which I have created.

Let me explain you how I created my cards.
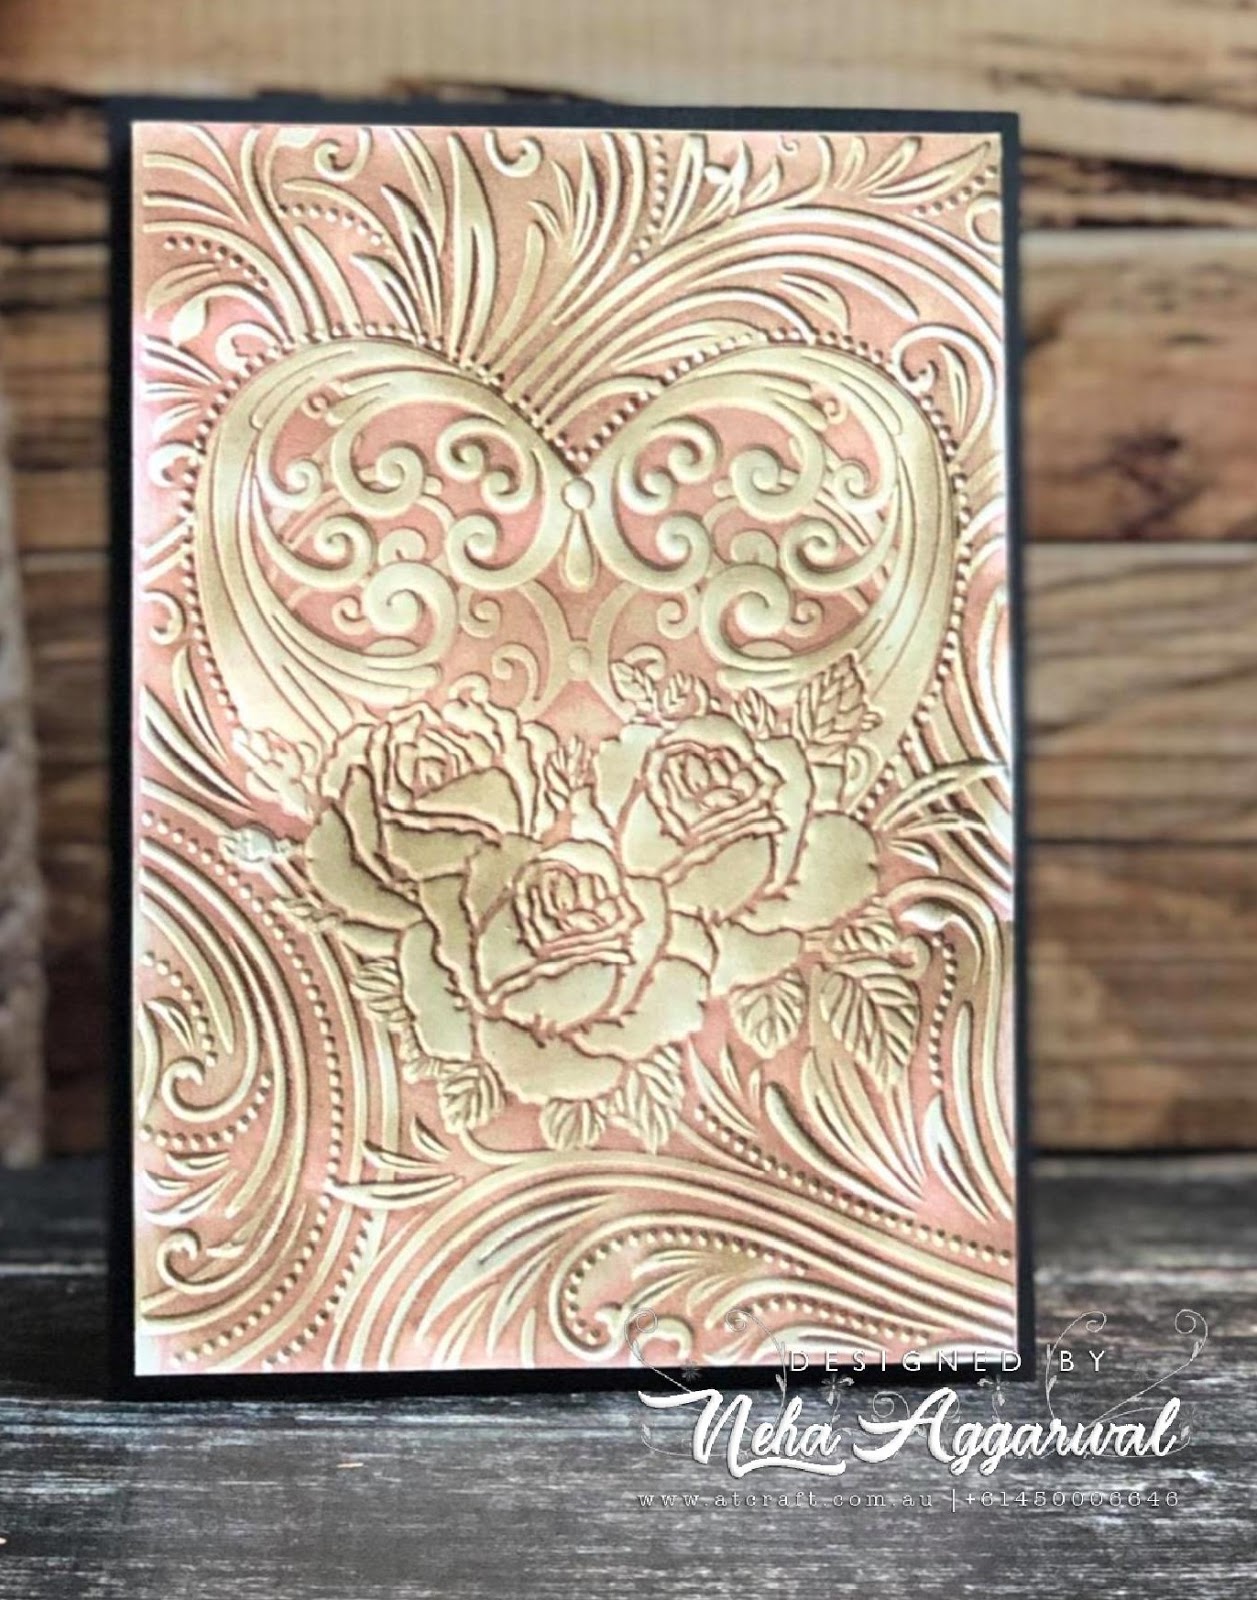
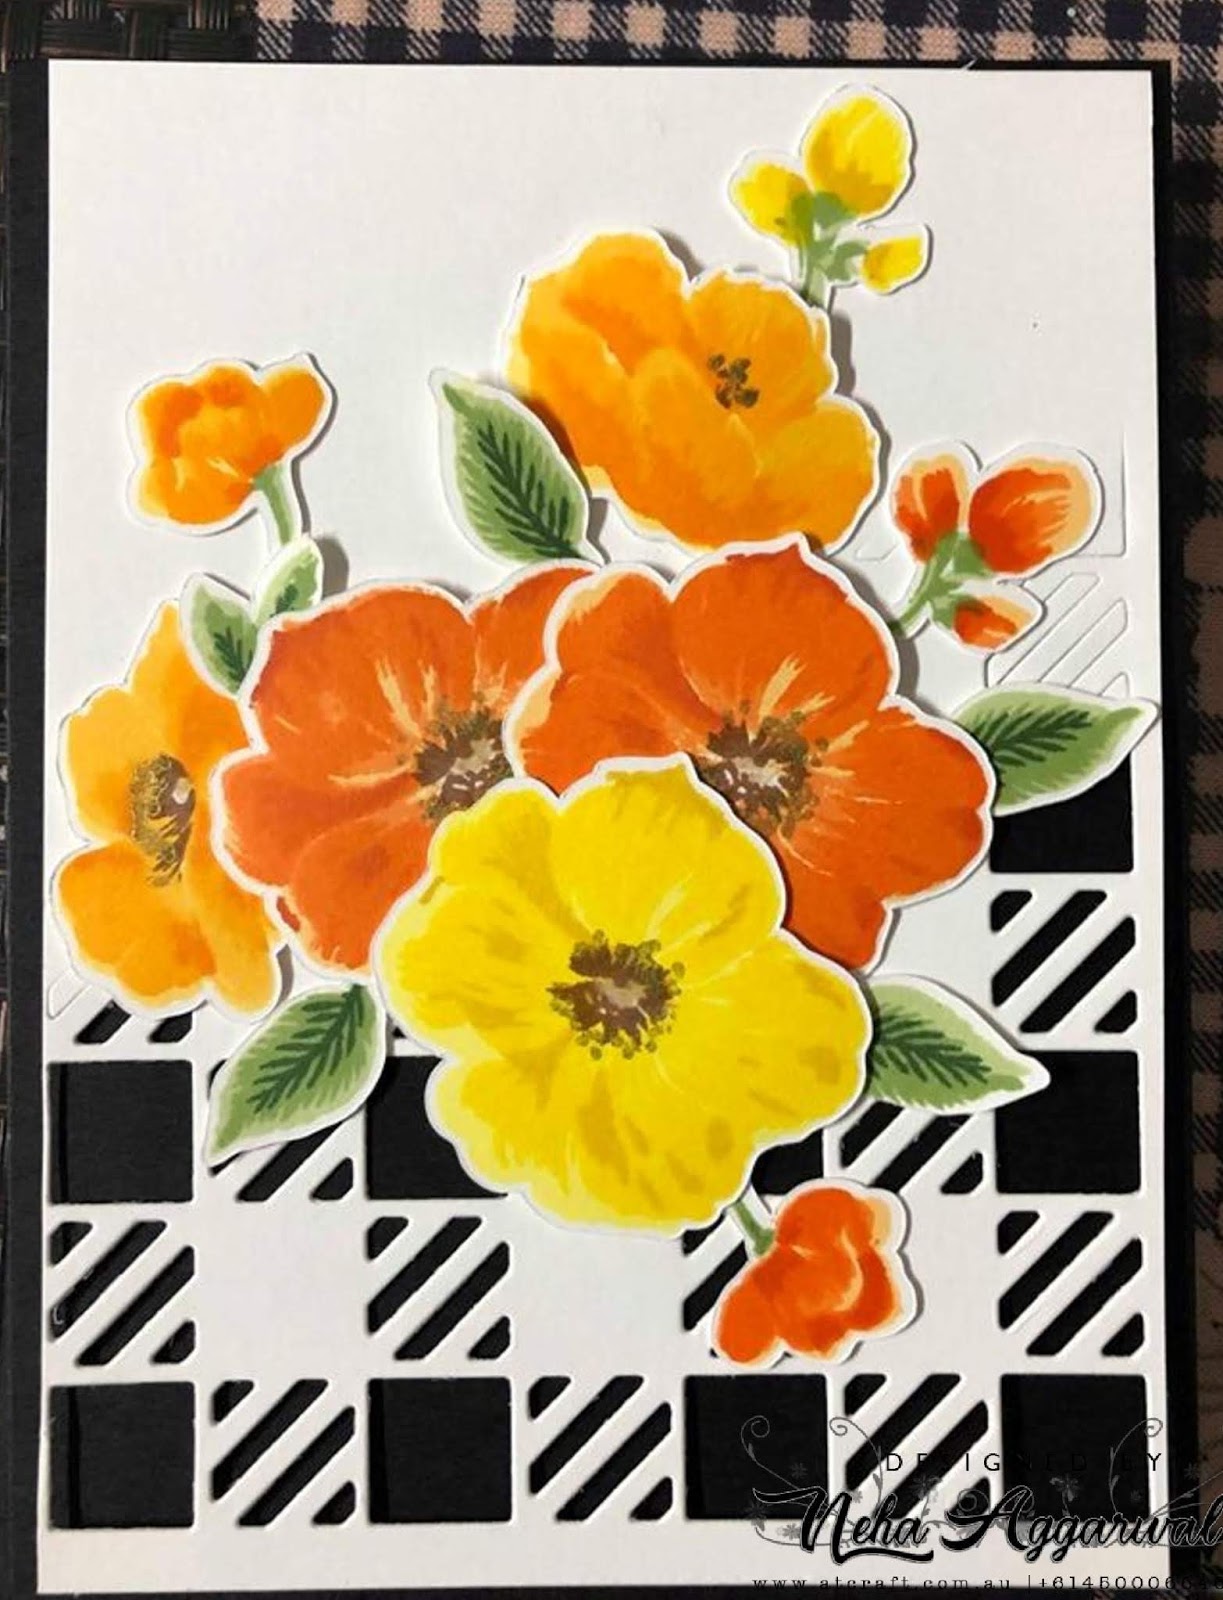
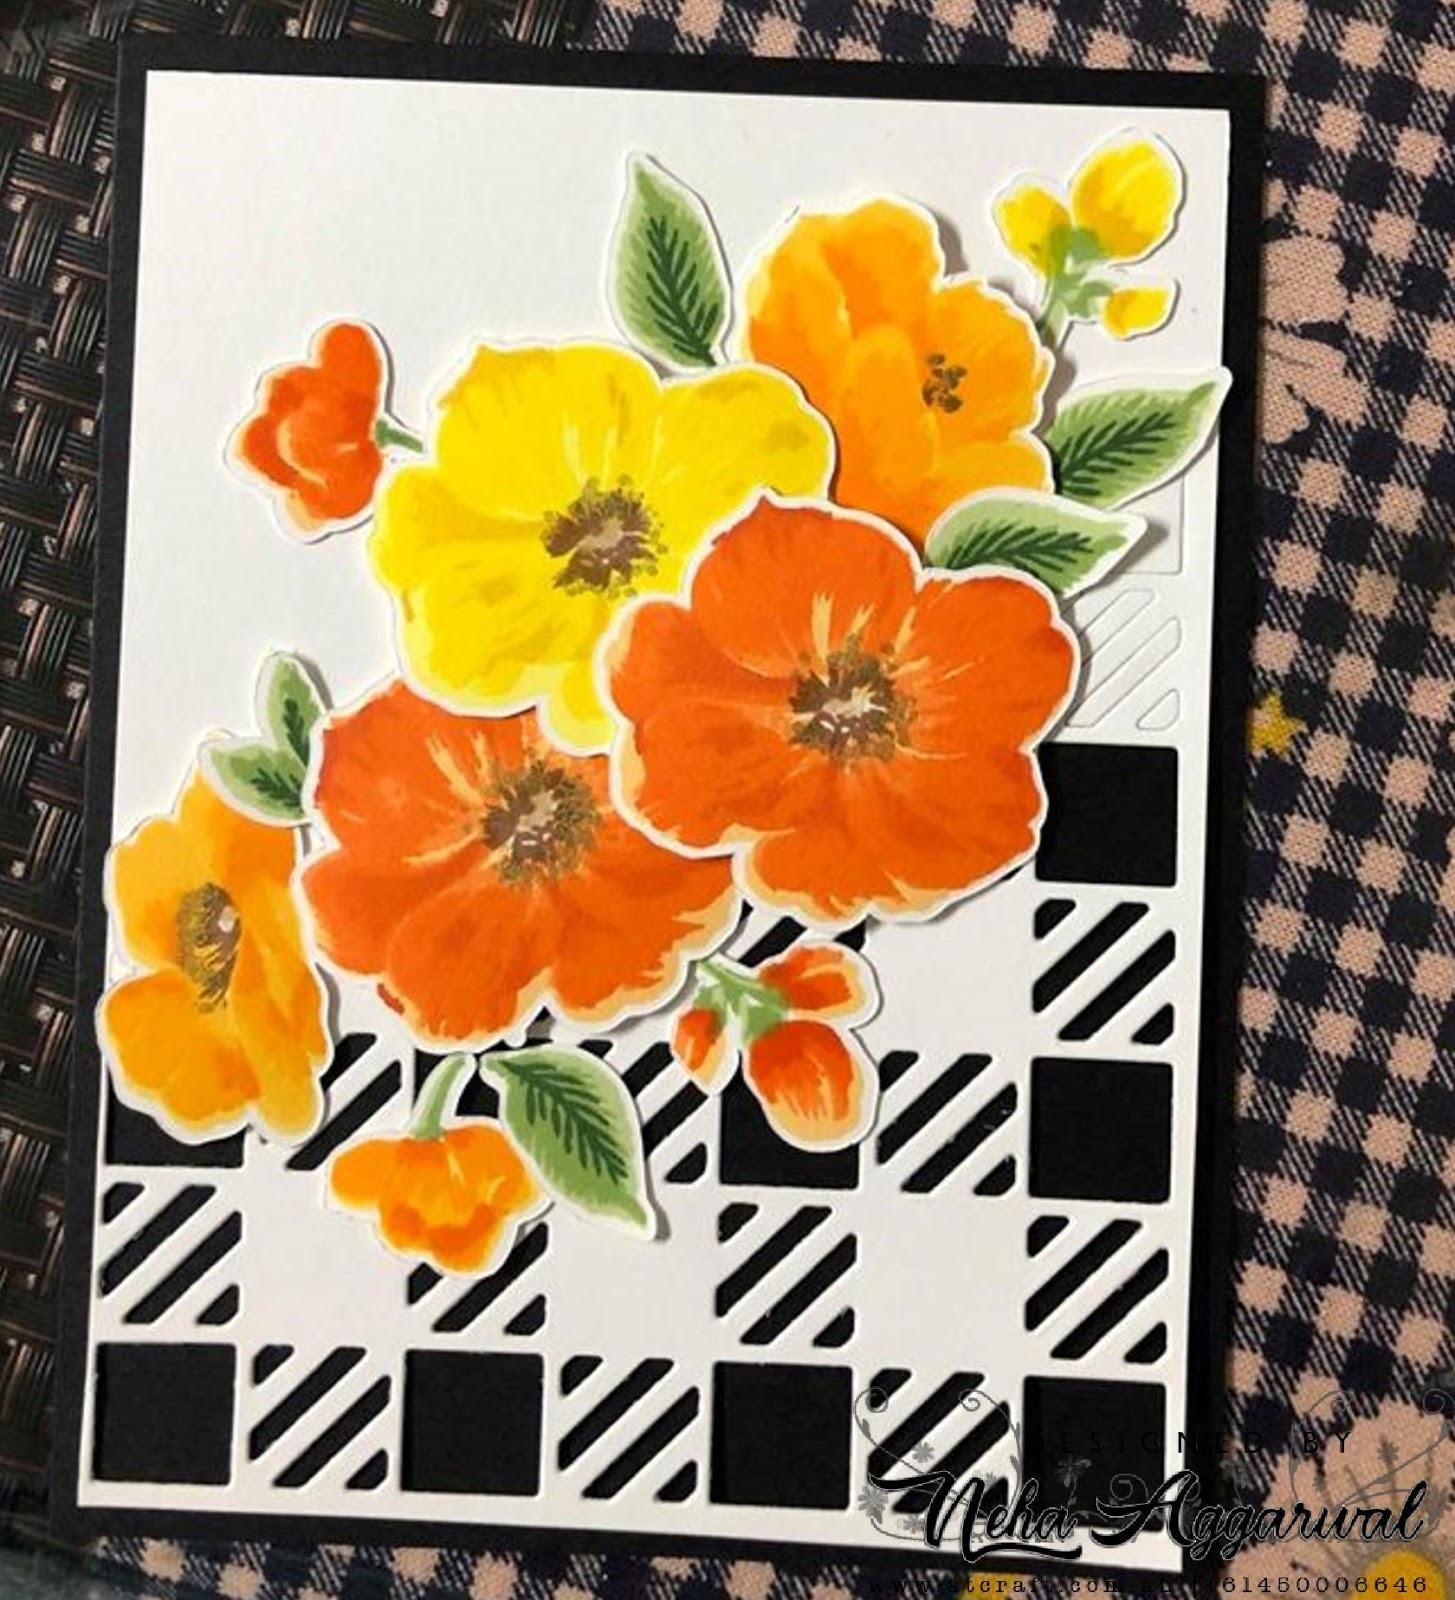
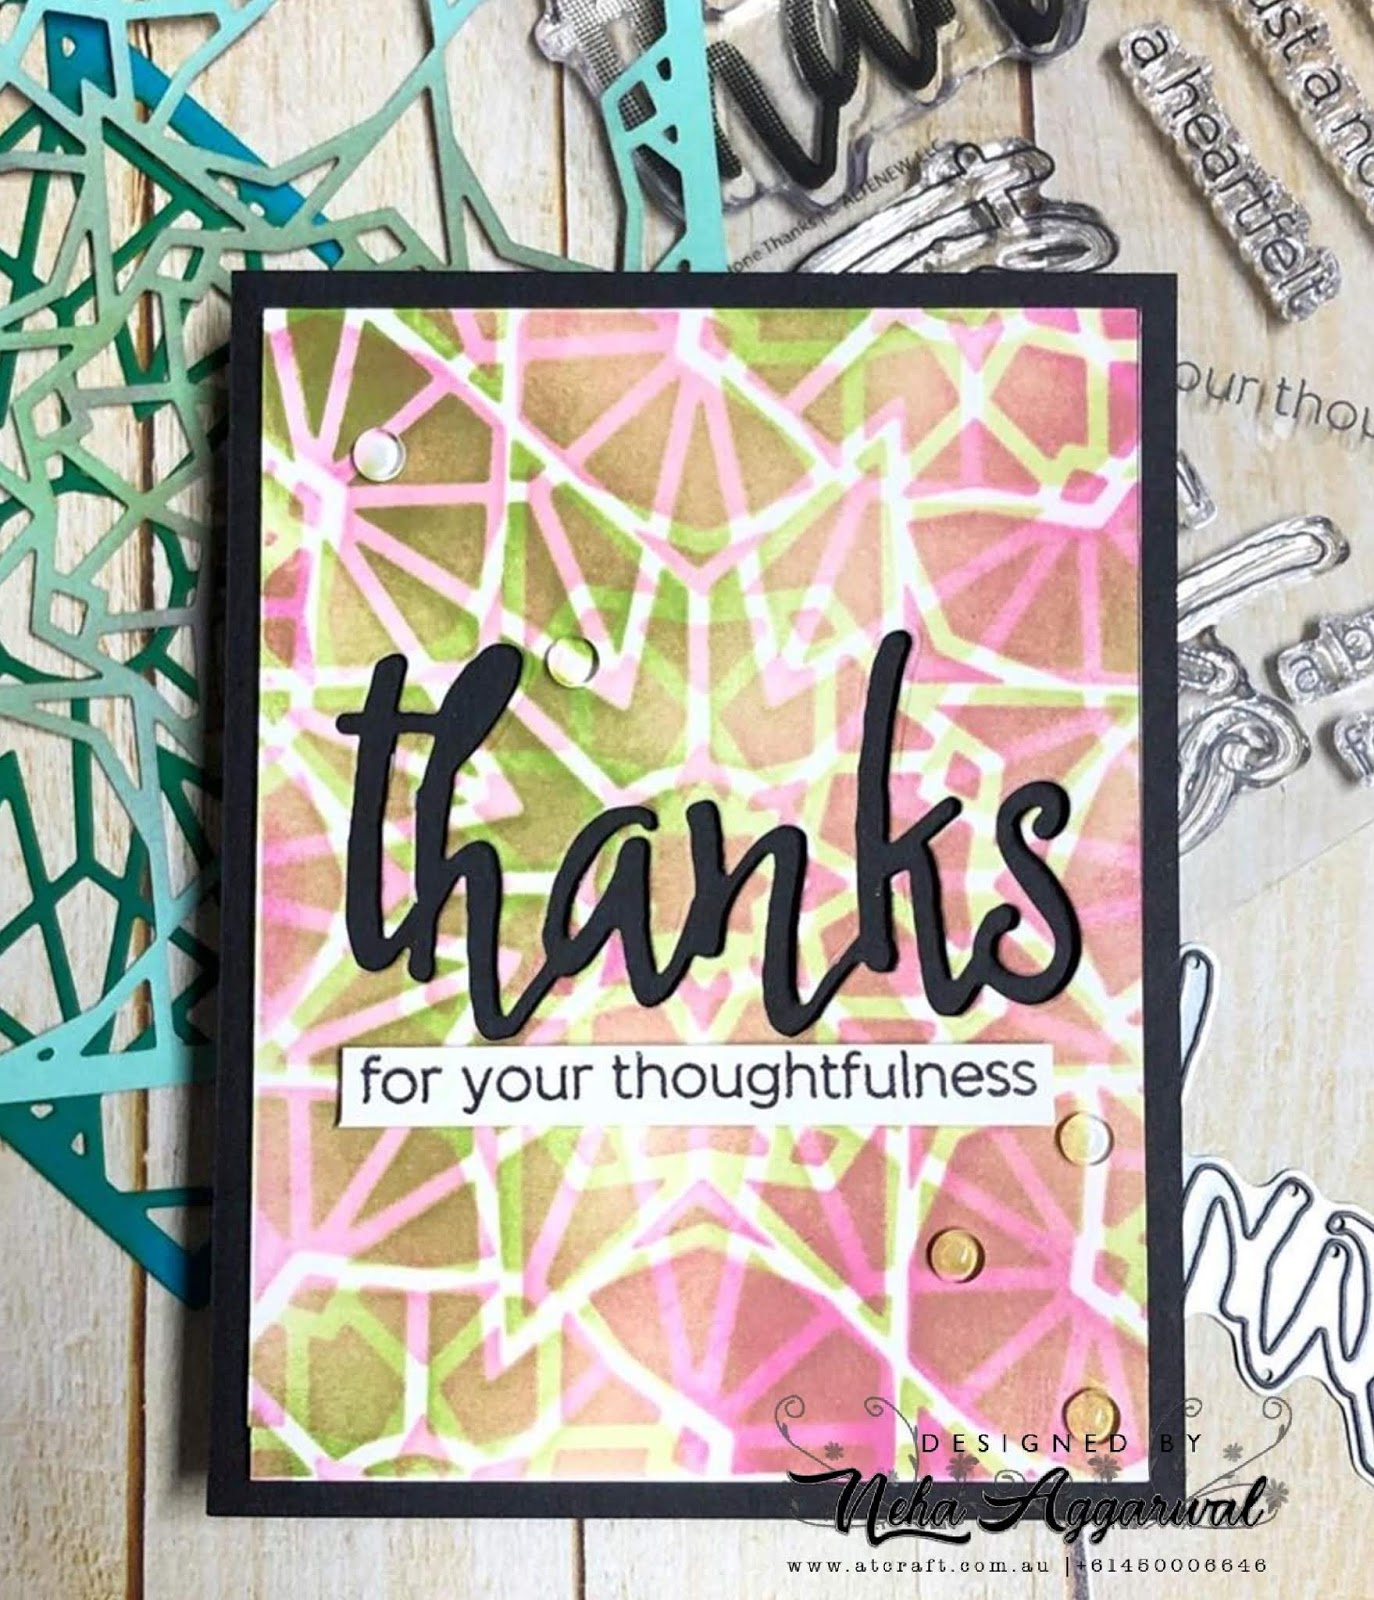
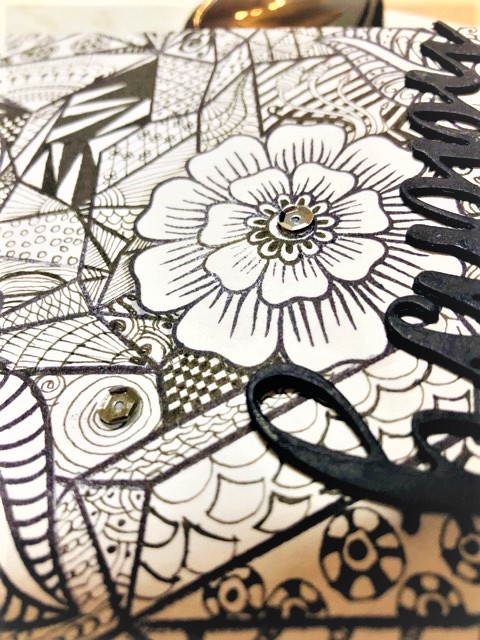
CARD 1:

Material Used:

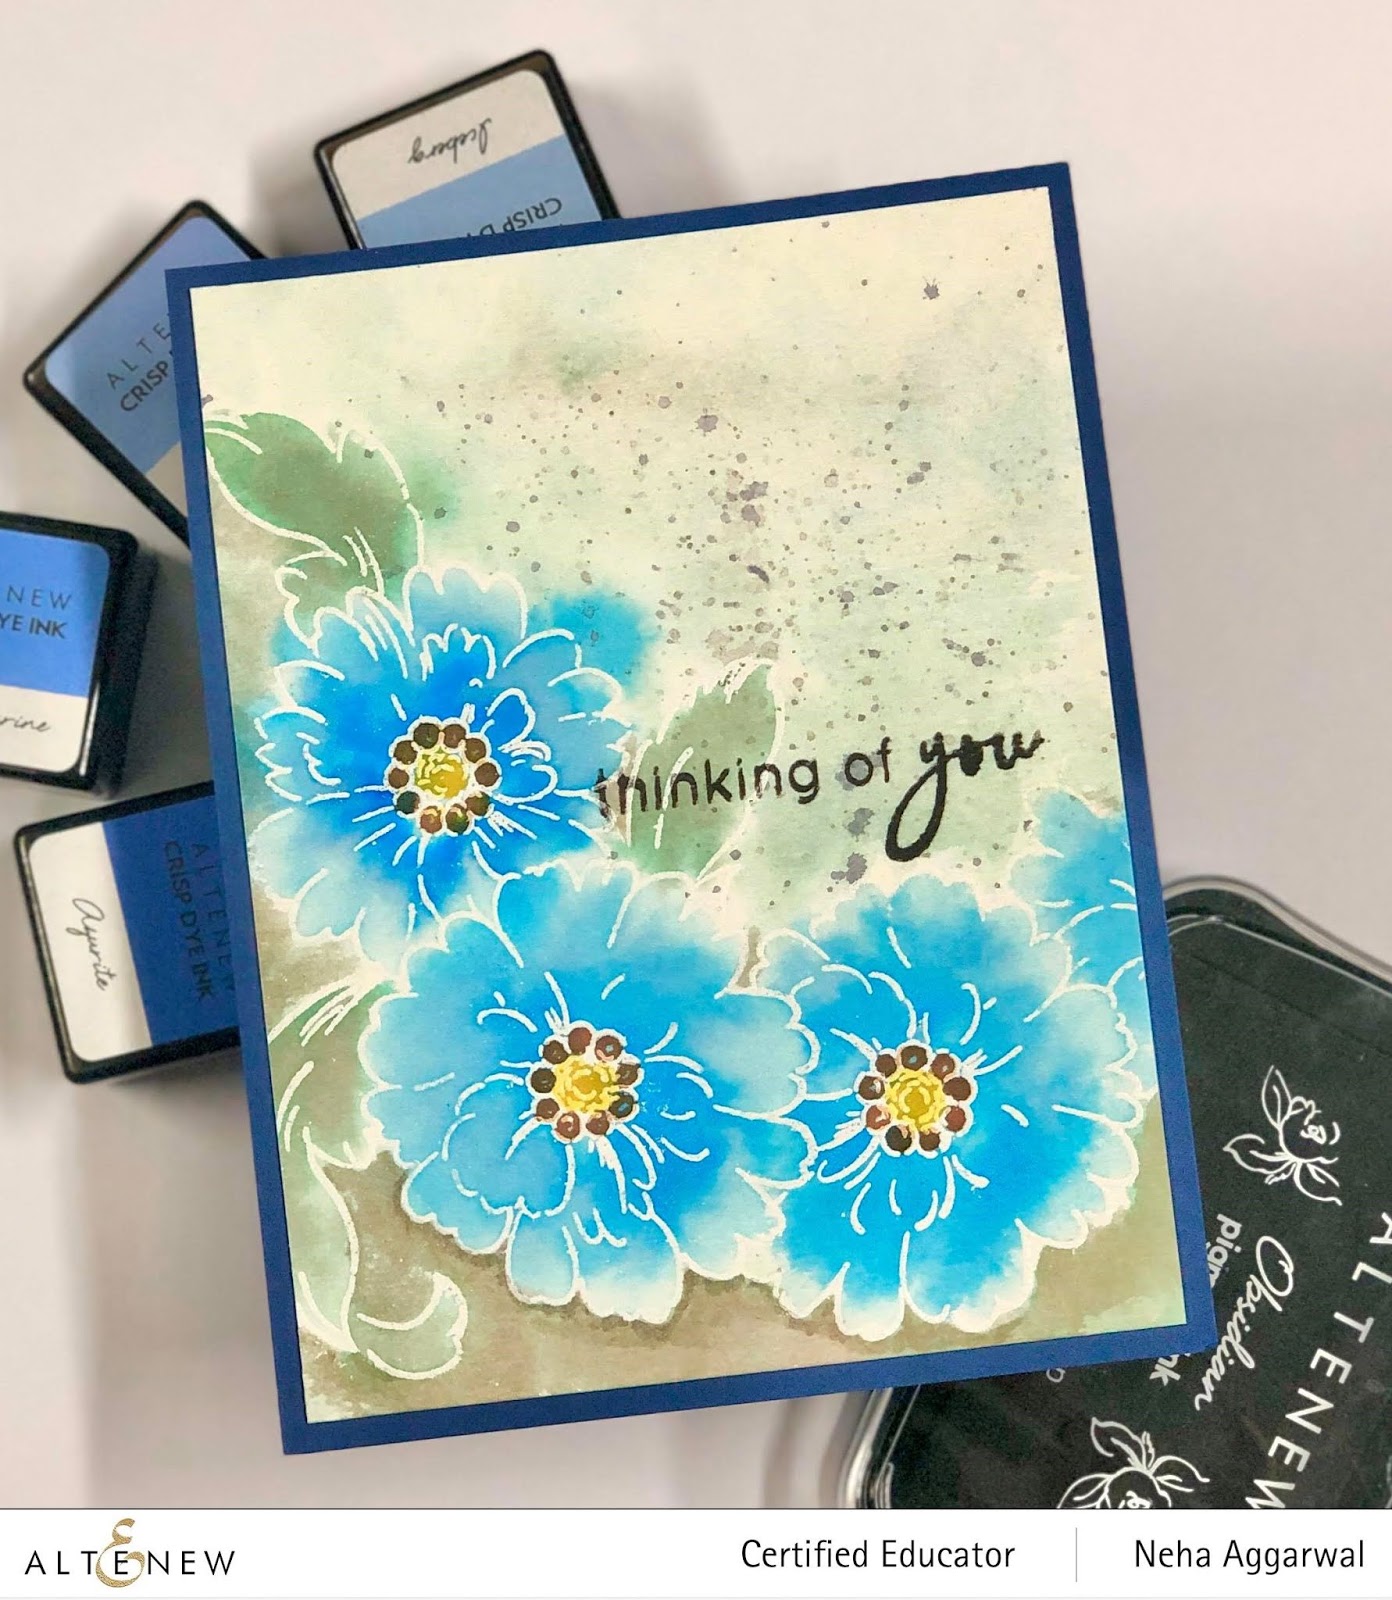
Stamps: Simple Beauty Stamp and Fancy Greeting.

Background with Alcohol Artist Marker Reinker: Persian Blue

Black Obsidian Ink for stamping my sentiment.

Neenah Solar white for my Card base 4 1/4' by 5 1/2' , Sentiment and flower stamping

White embossing powder along with Versamark and heat gun

Altenew sapphire ink pad from Glacier cave ,Warm and Cozy Ink pad and Greenfields

YUPO paper Medium weight

Rubbing Alcohol or Blending Solution

Steps:

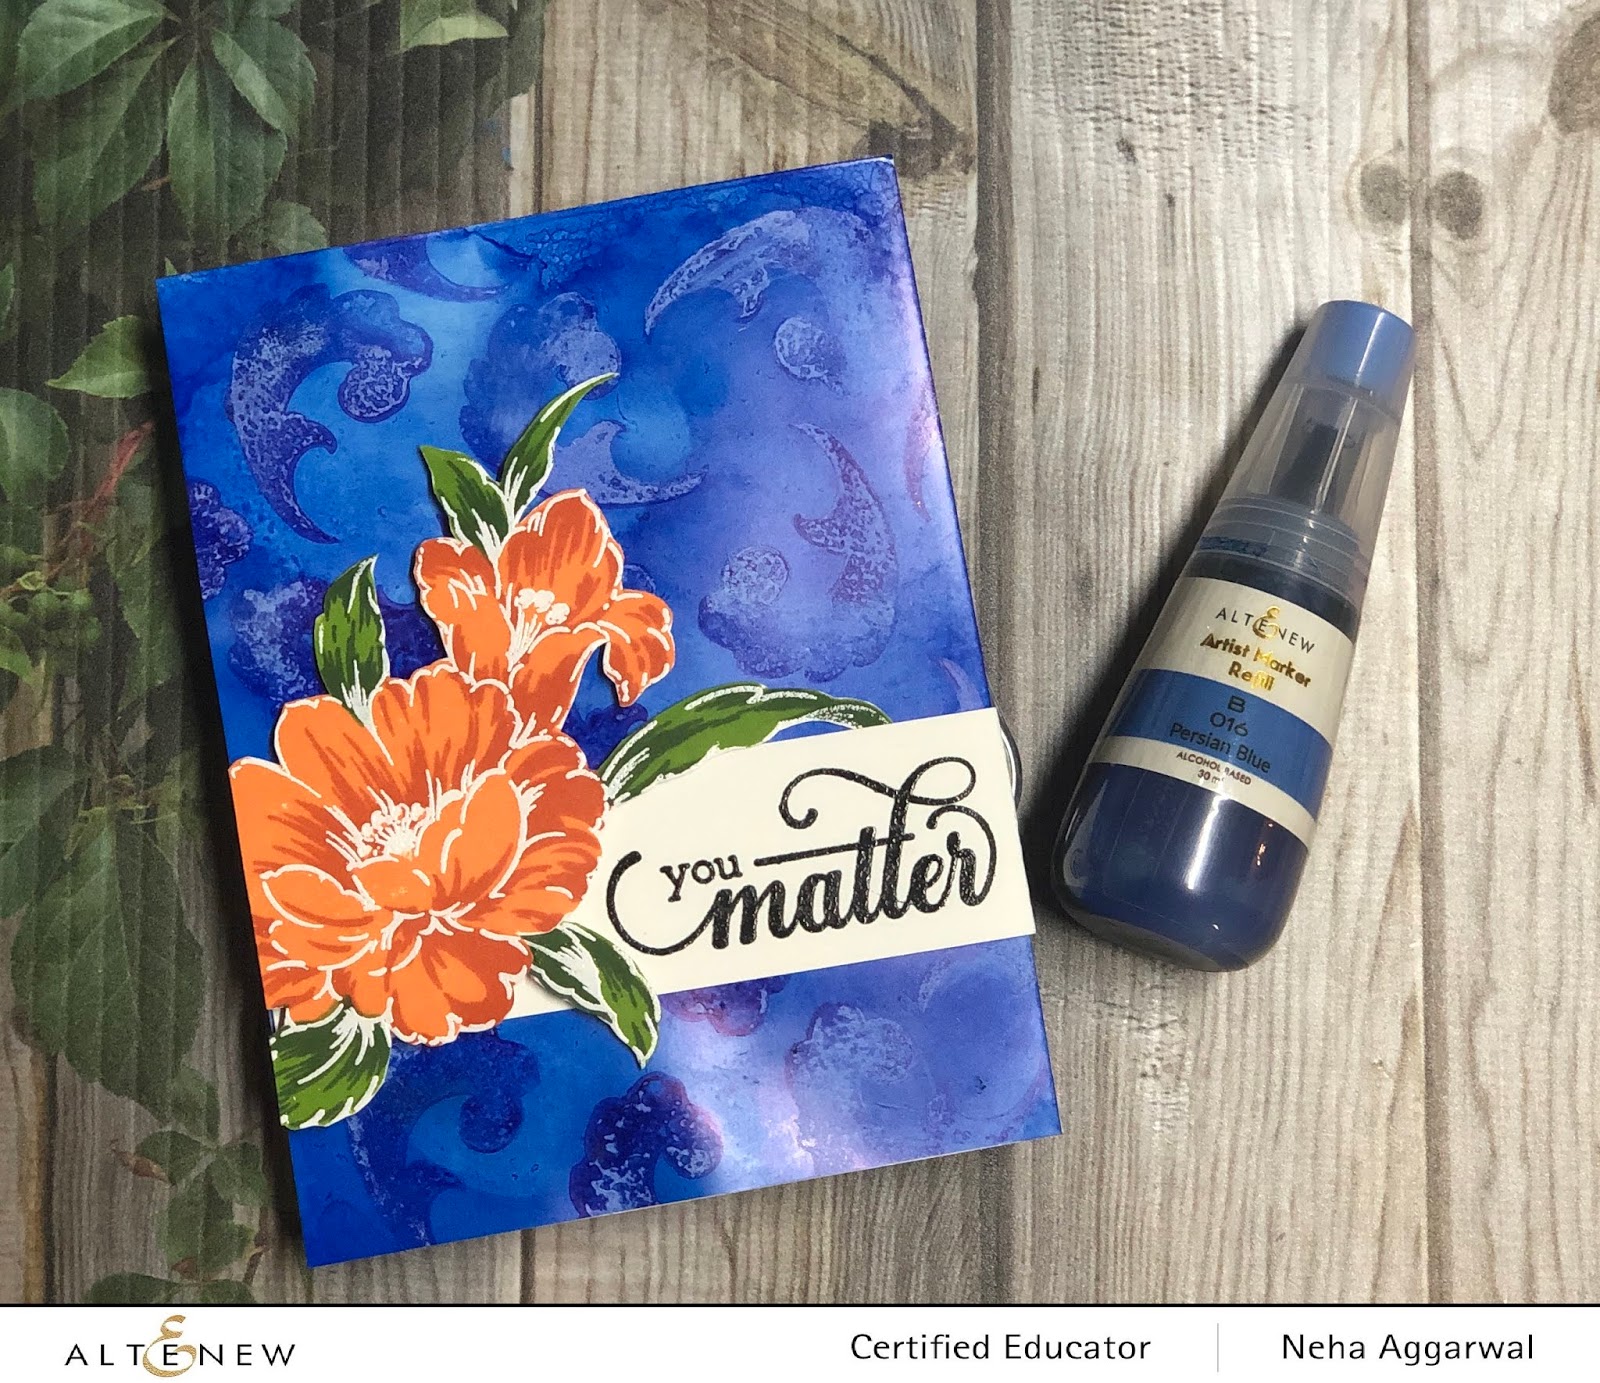
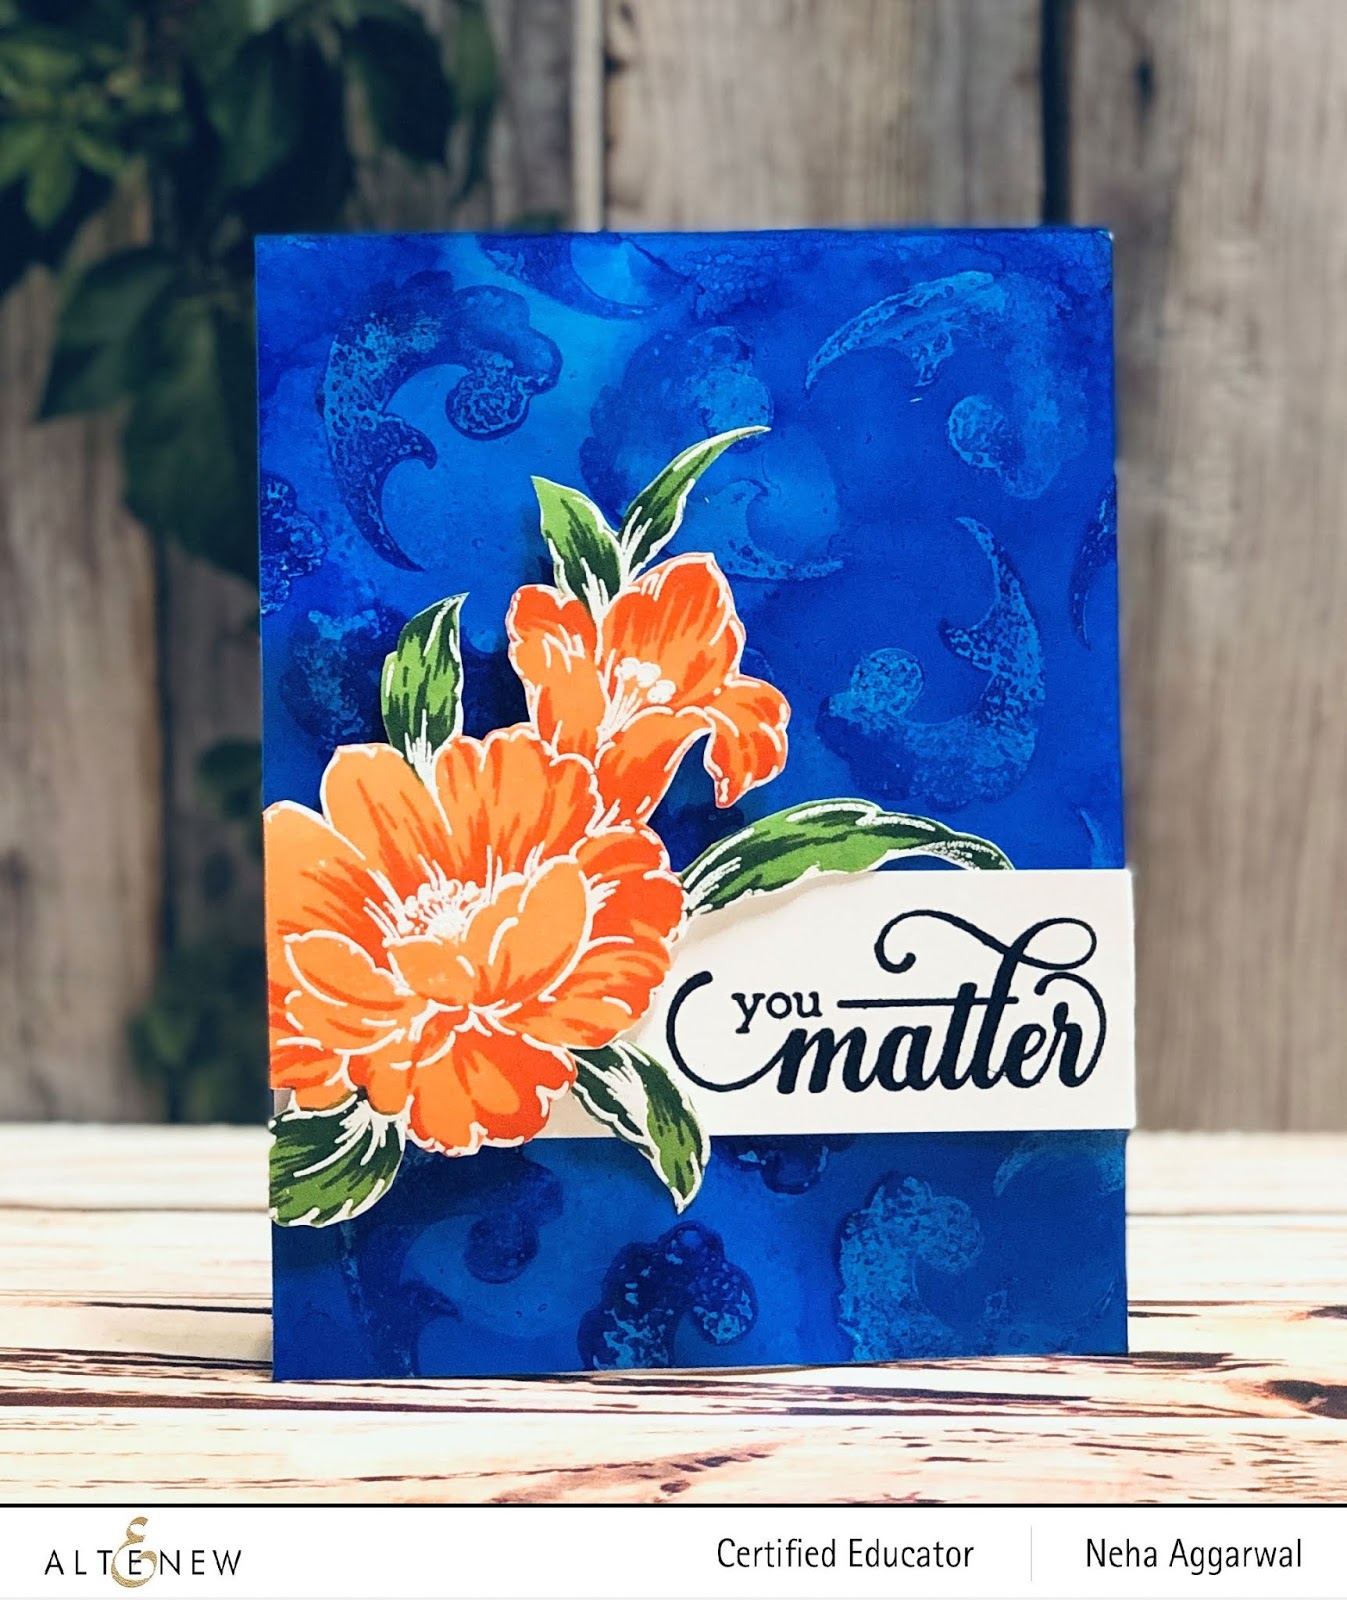
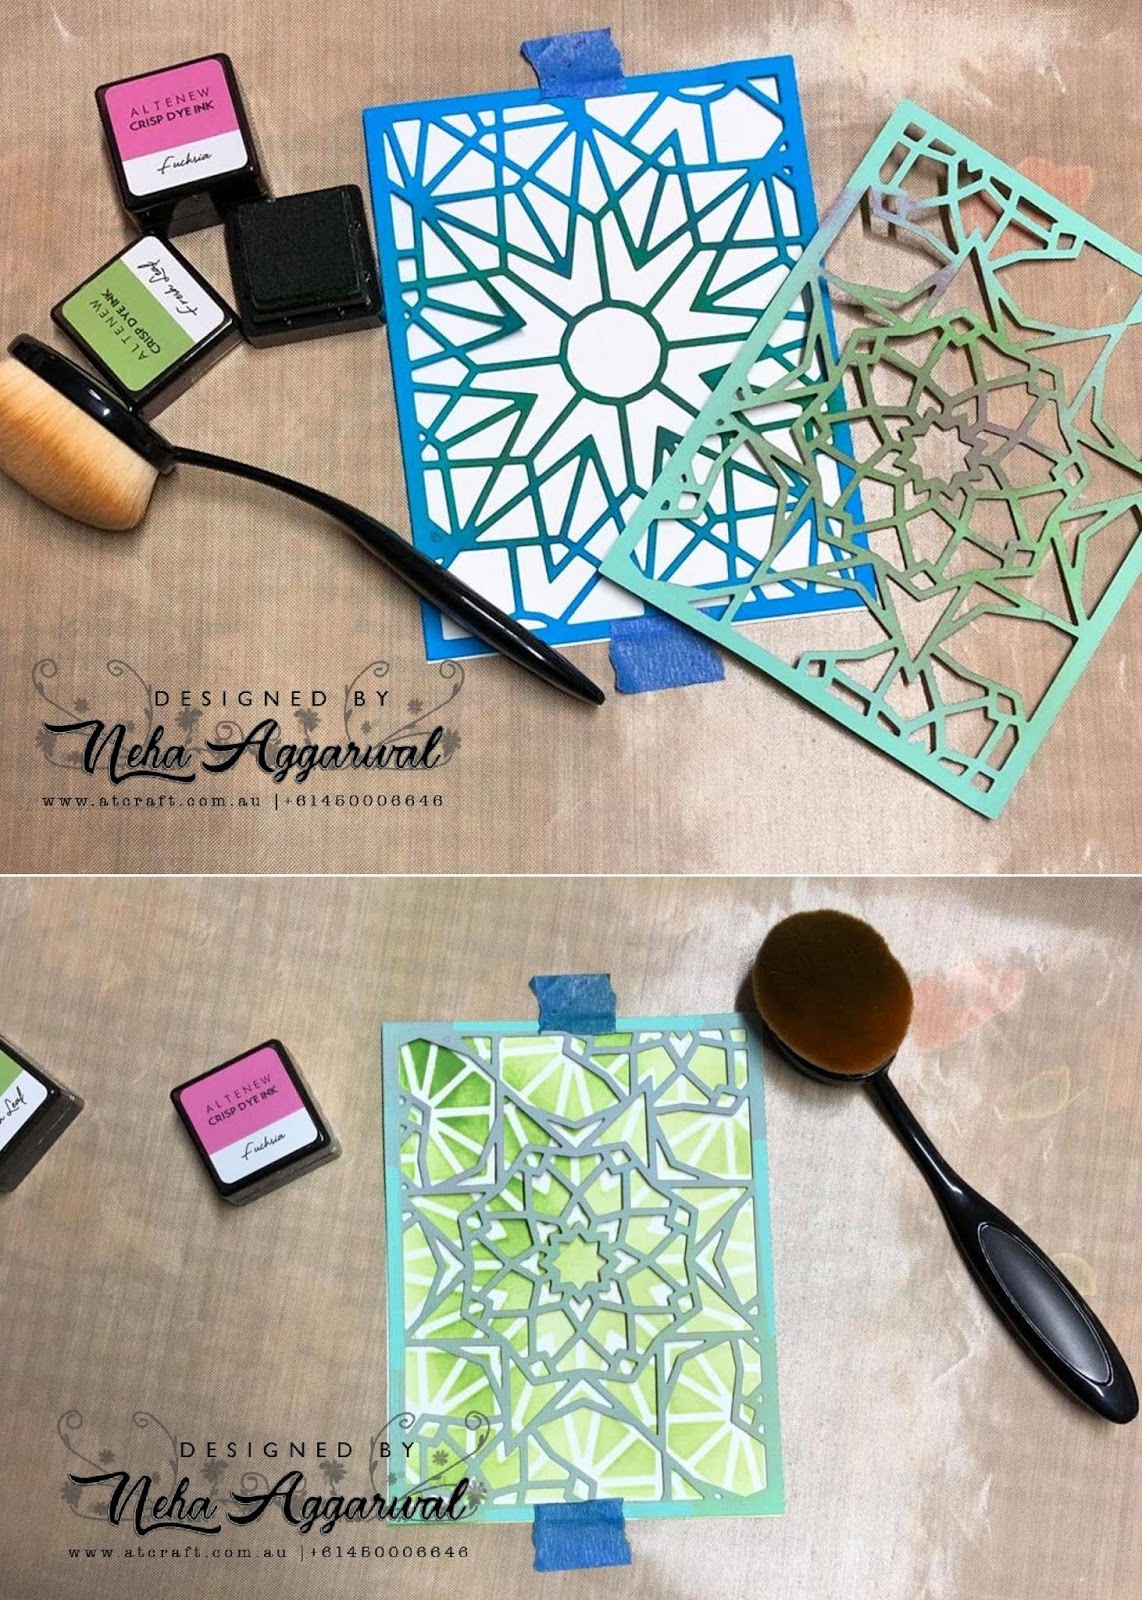
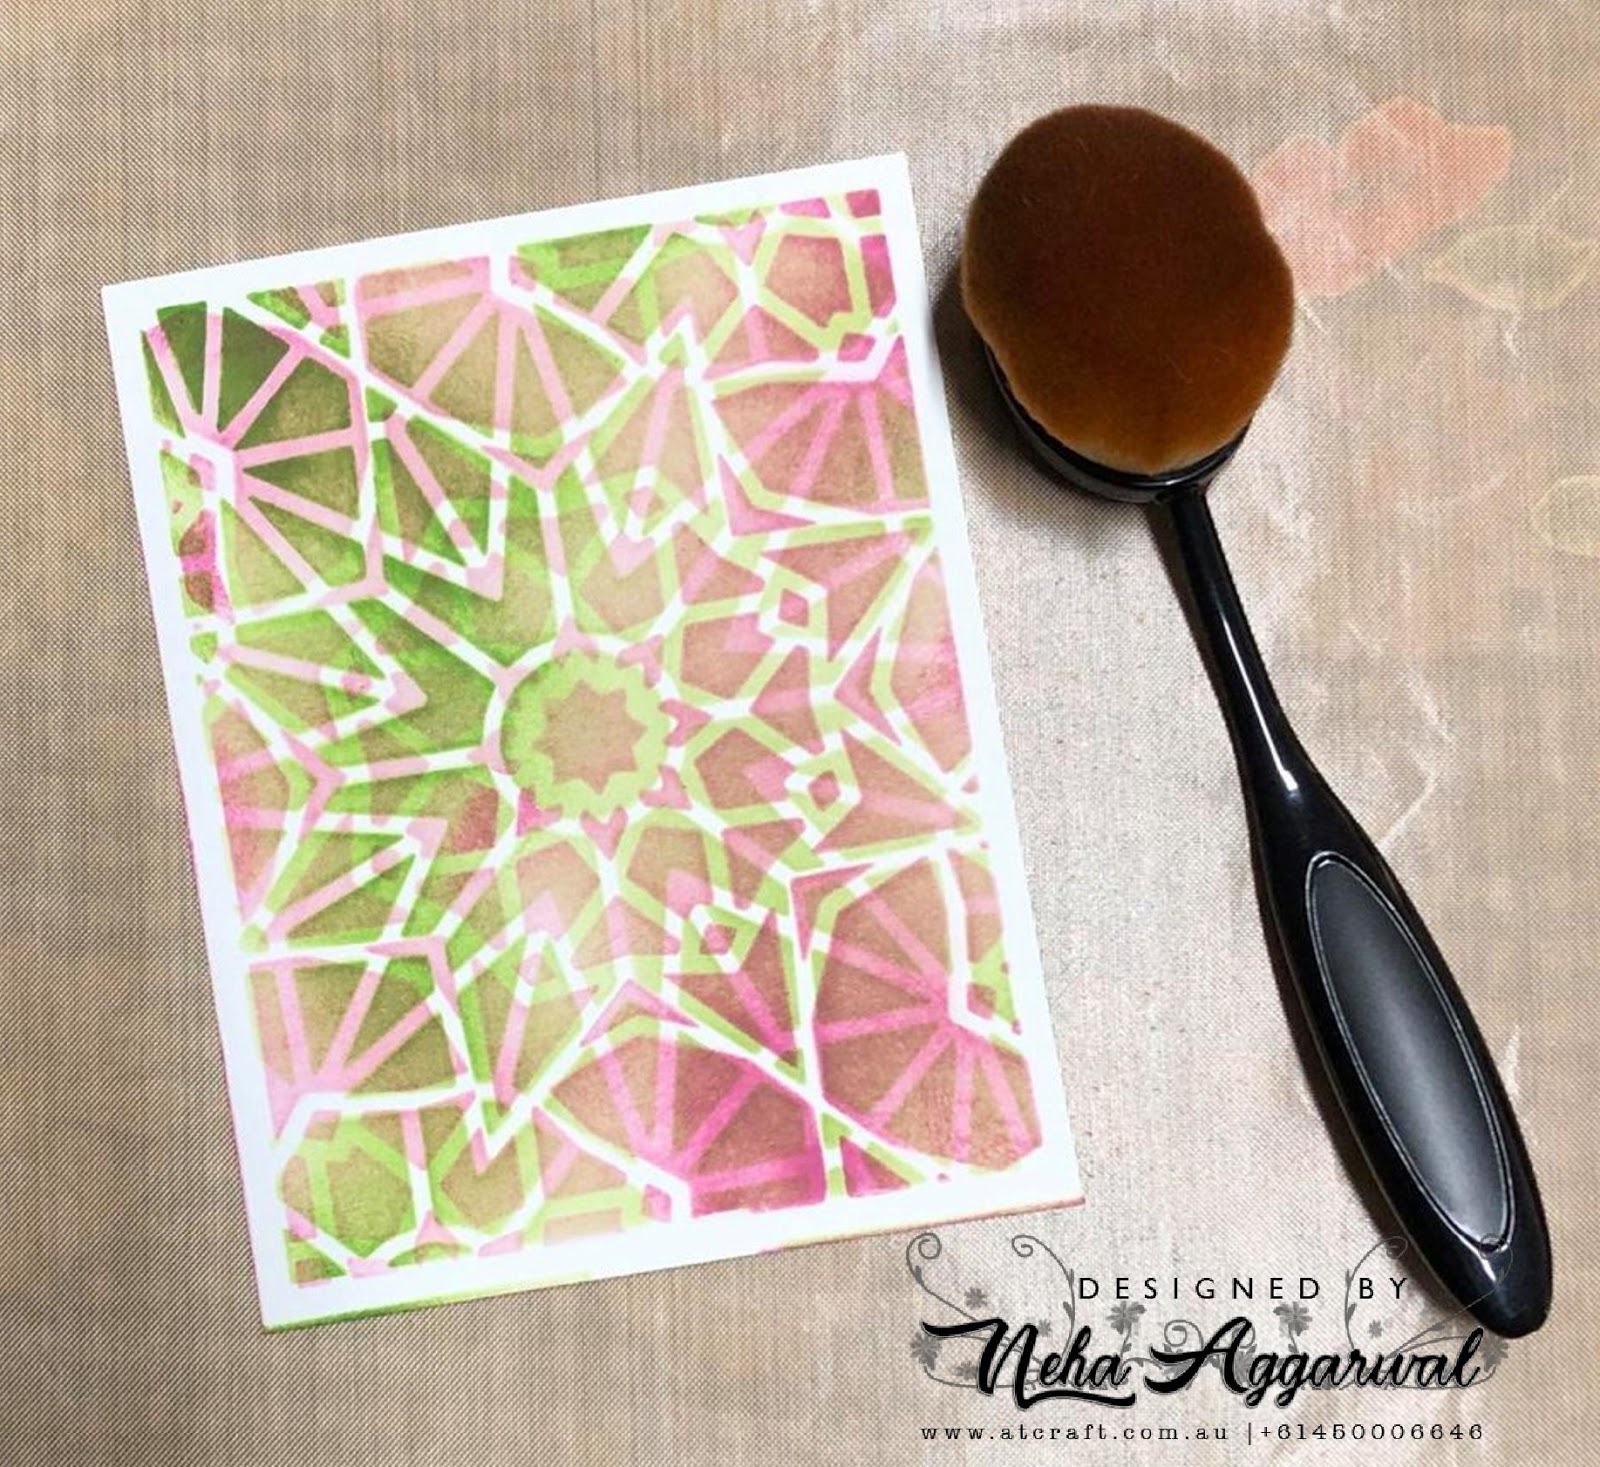
1. To make the background I first took the alcohol ink and dropped few drops on my YUPO paper ( measures 4 1/4' by 5 1/2' ) . Spreading that ink with the help of a straw and also used blending solution to make it more runny across the paper.

2. Once the background was all dried , then I used the Sapphire ink pad from Glacier Cave Altenew inks and stamped the swirls used from Simple beauty stamps on the yupo. Once they were bit dry , I took my microfiber cloth and buffed those stamped images so that they look faded stamped images on the background.

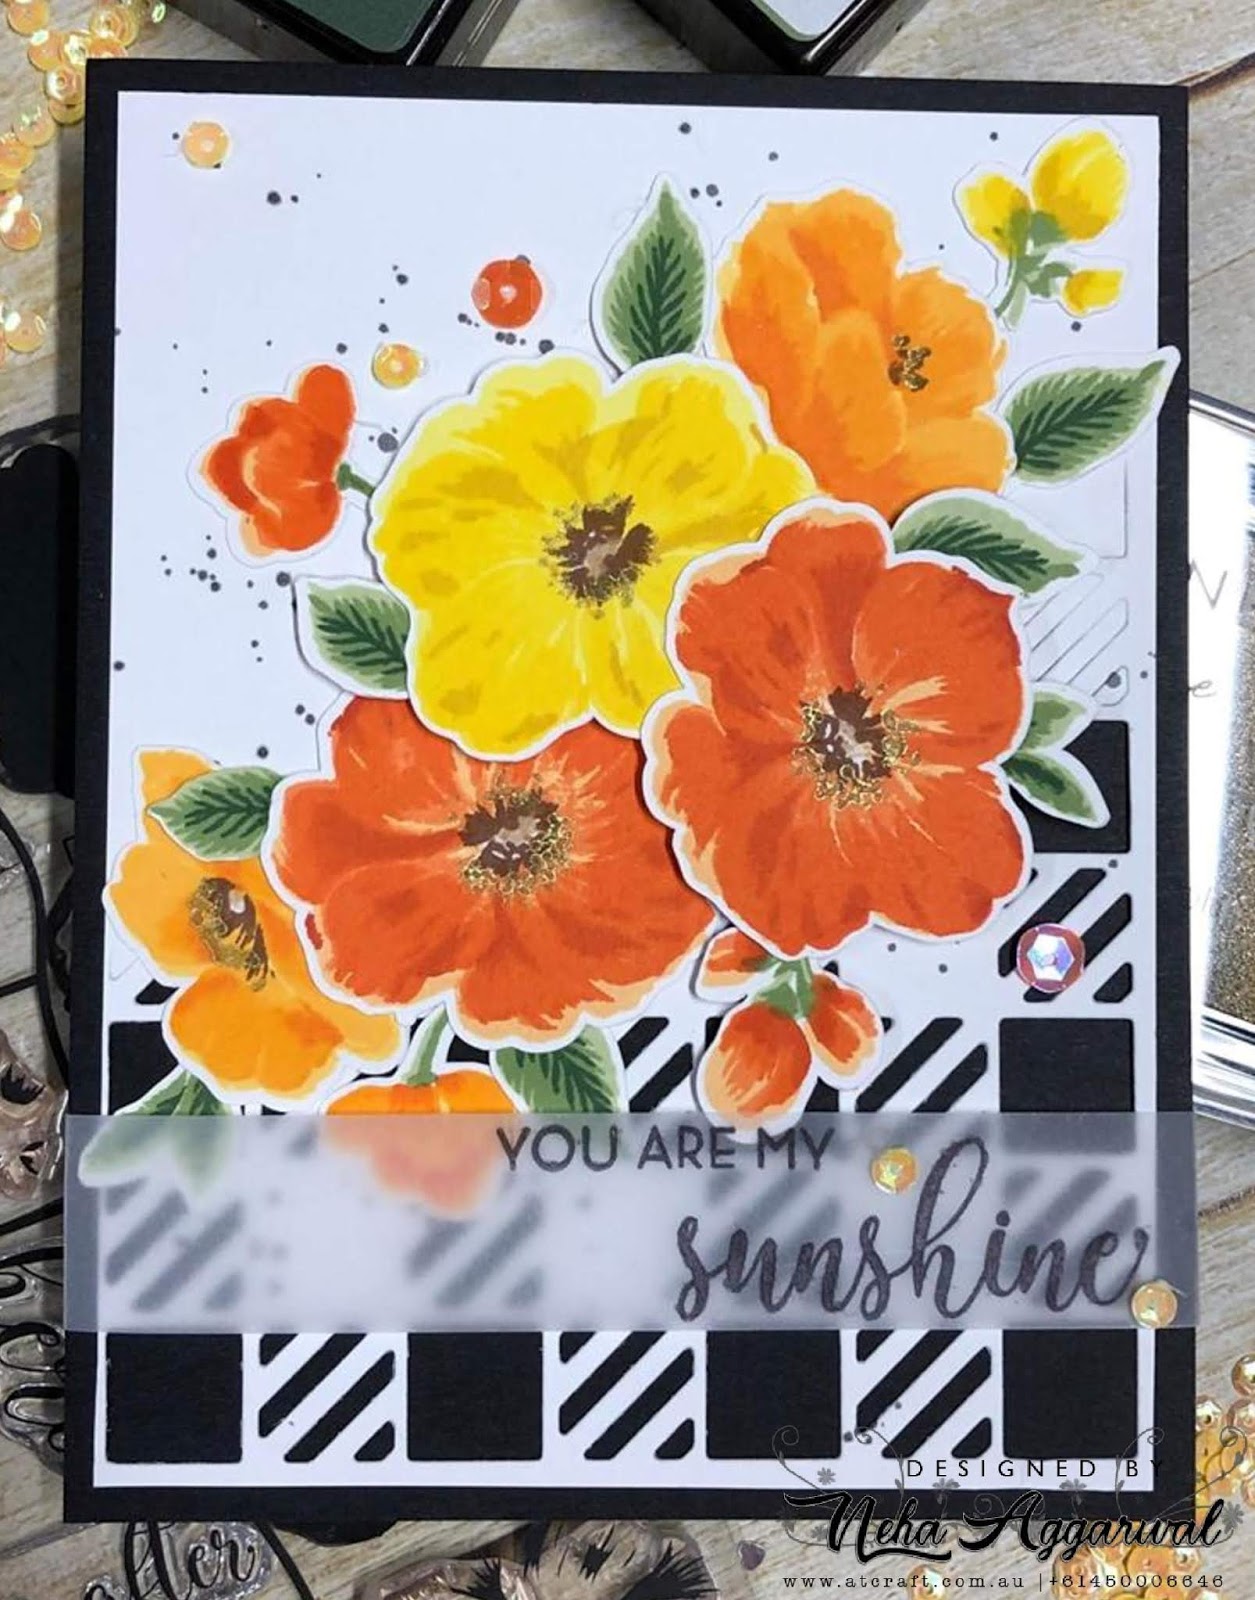
3. Now separately on a Neenah solar white I heat embossed with white my flowers from Simple Beauty Stamp set and layered them with the warm and cozy ink pad and Greenfields.

4. I also stamped the sentiment with Black Obsidian on Neenah to put behind my flowers.

5. I stuck my flower on with the foam tape and the rest with the Altenew Adhesive.
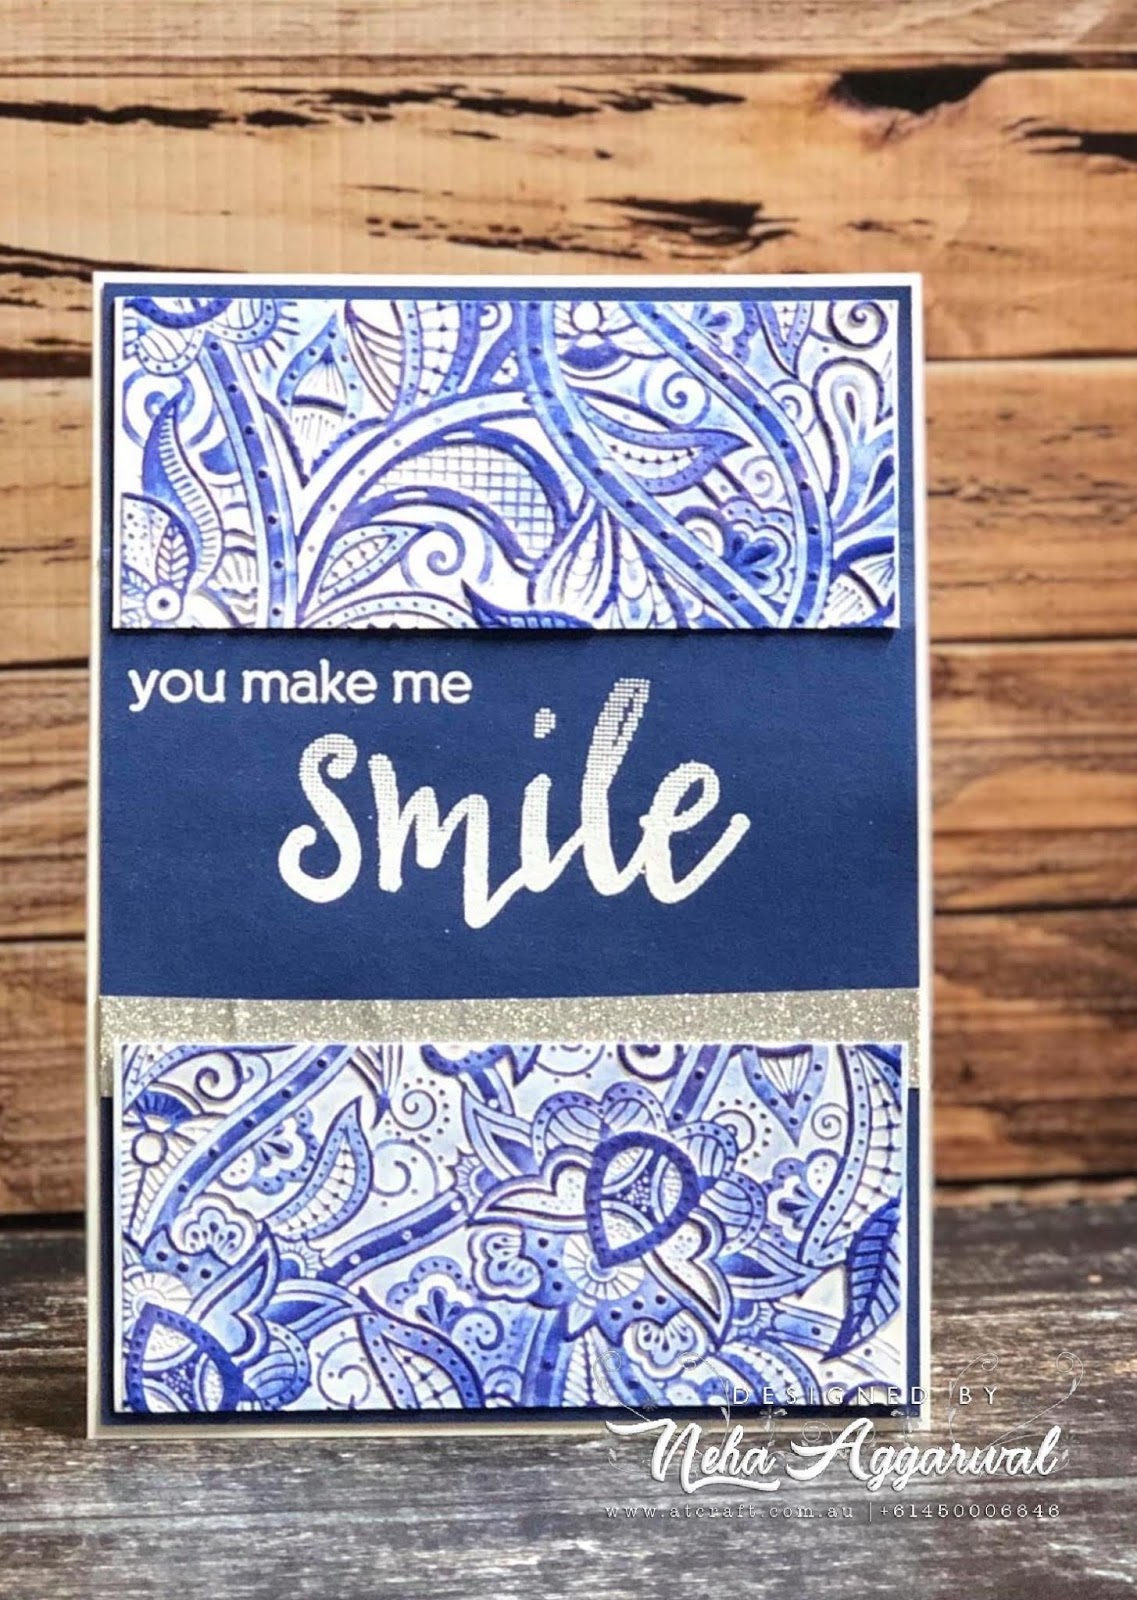
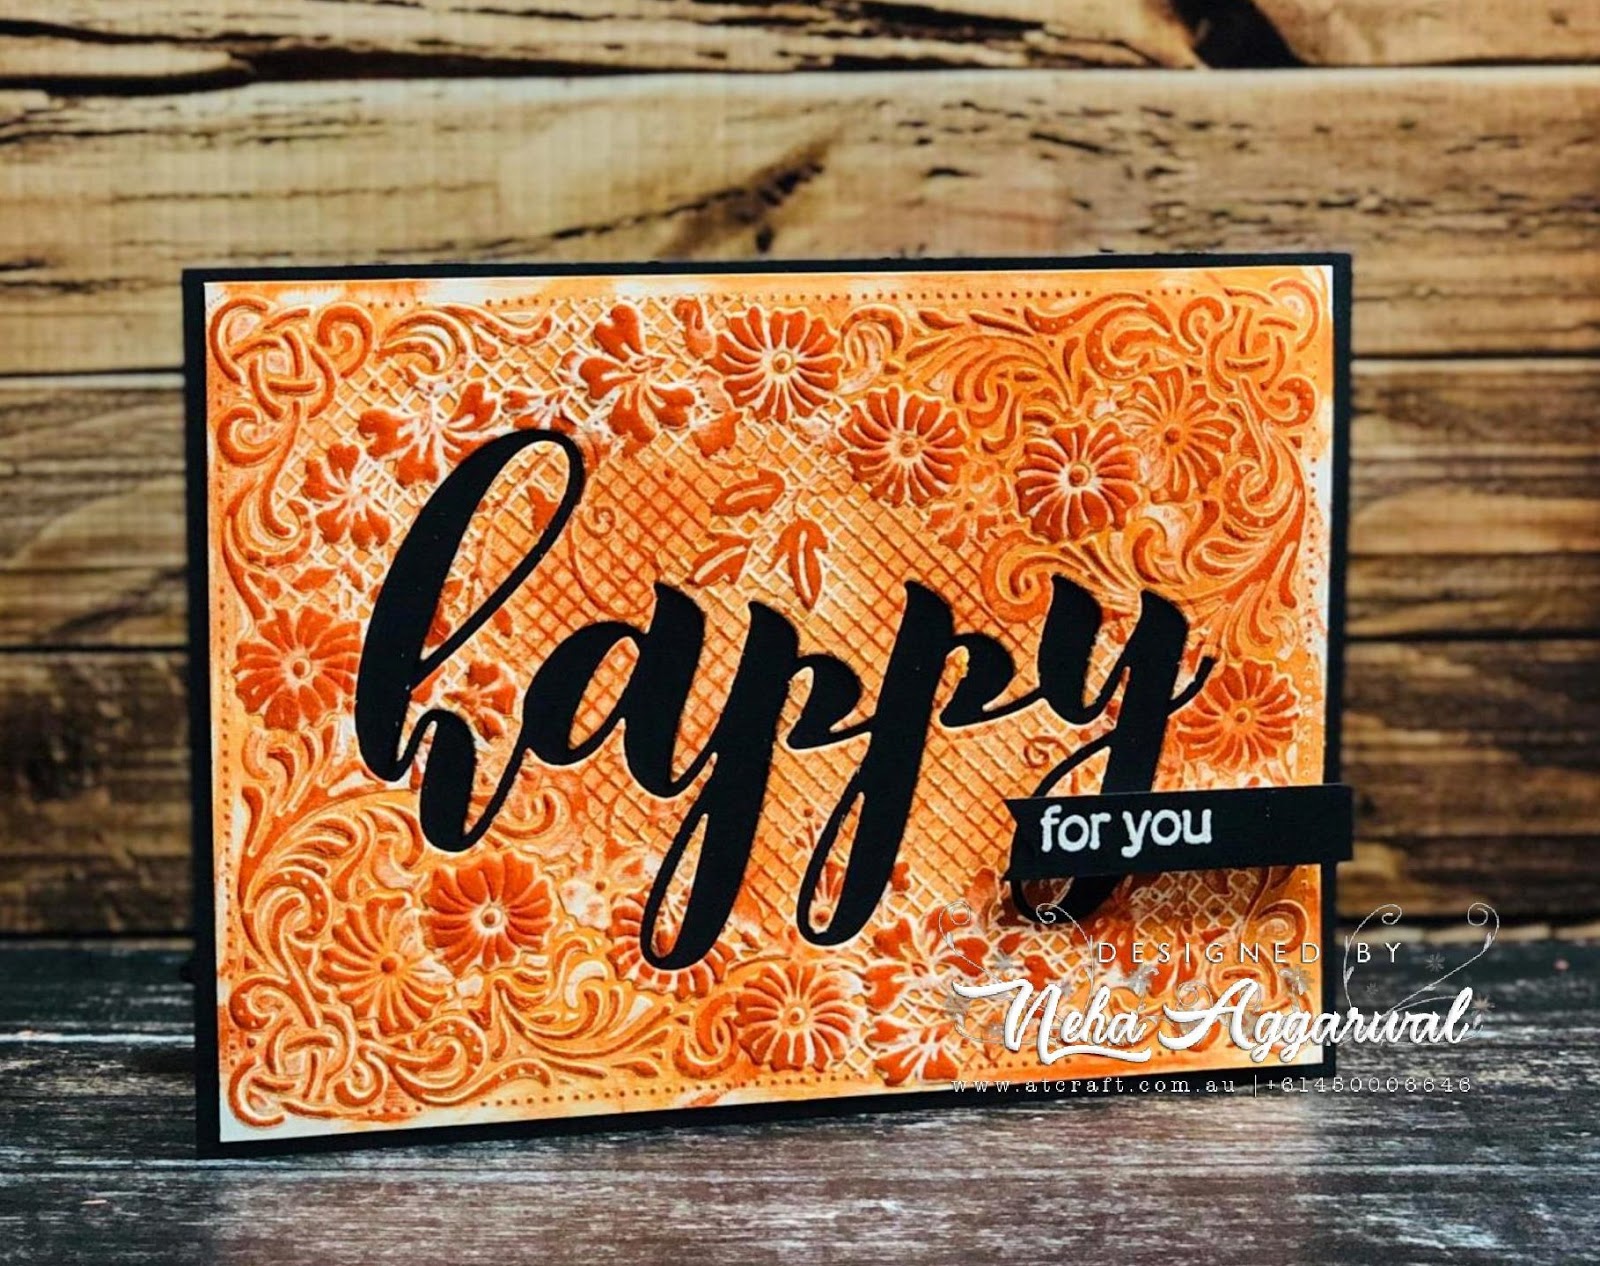
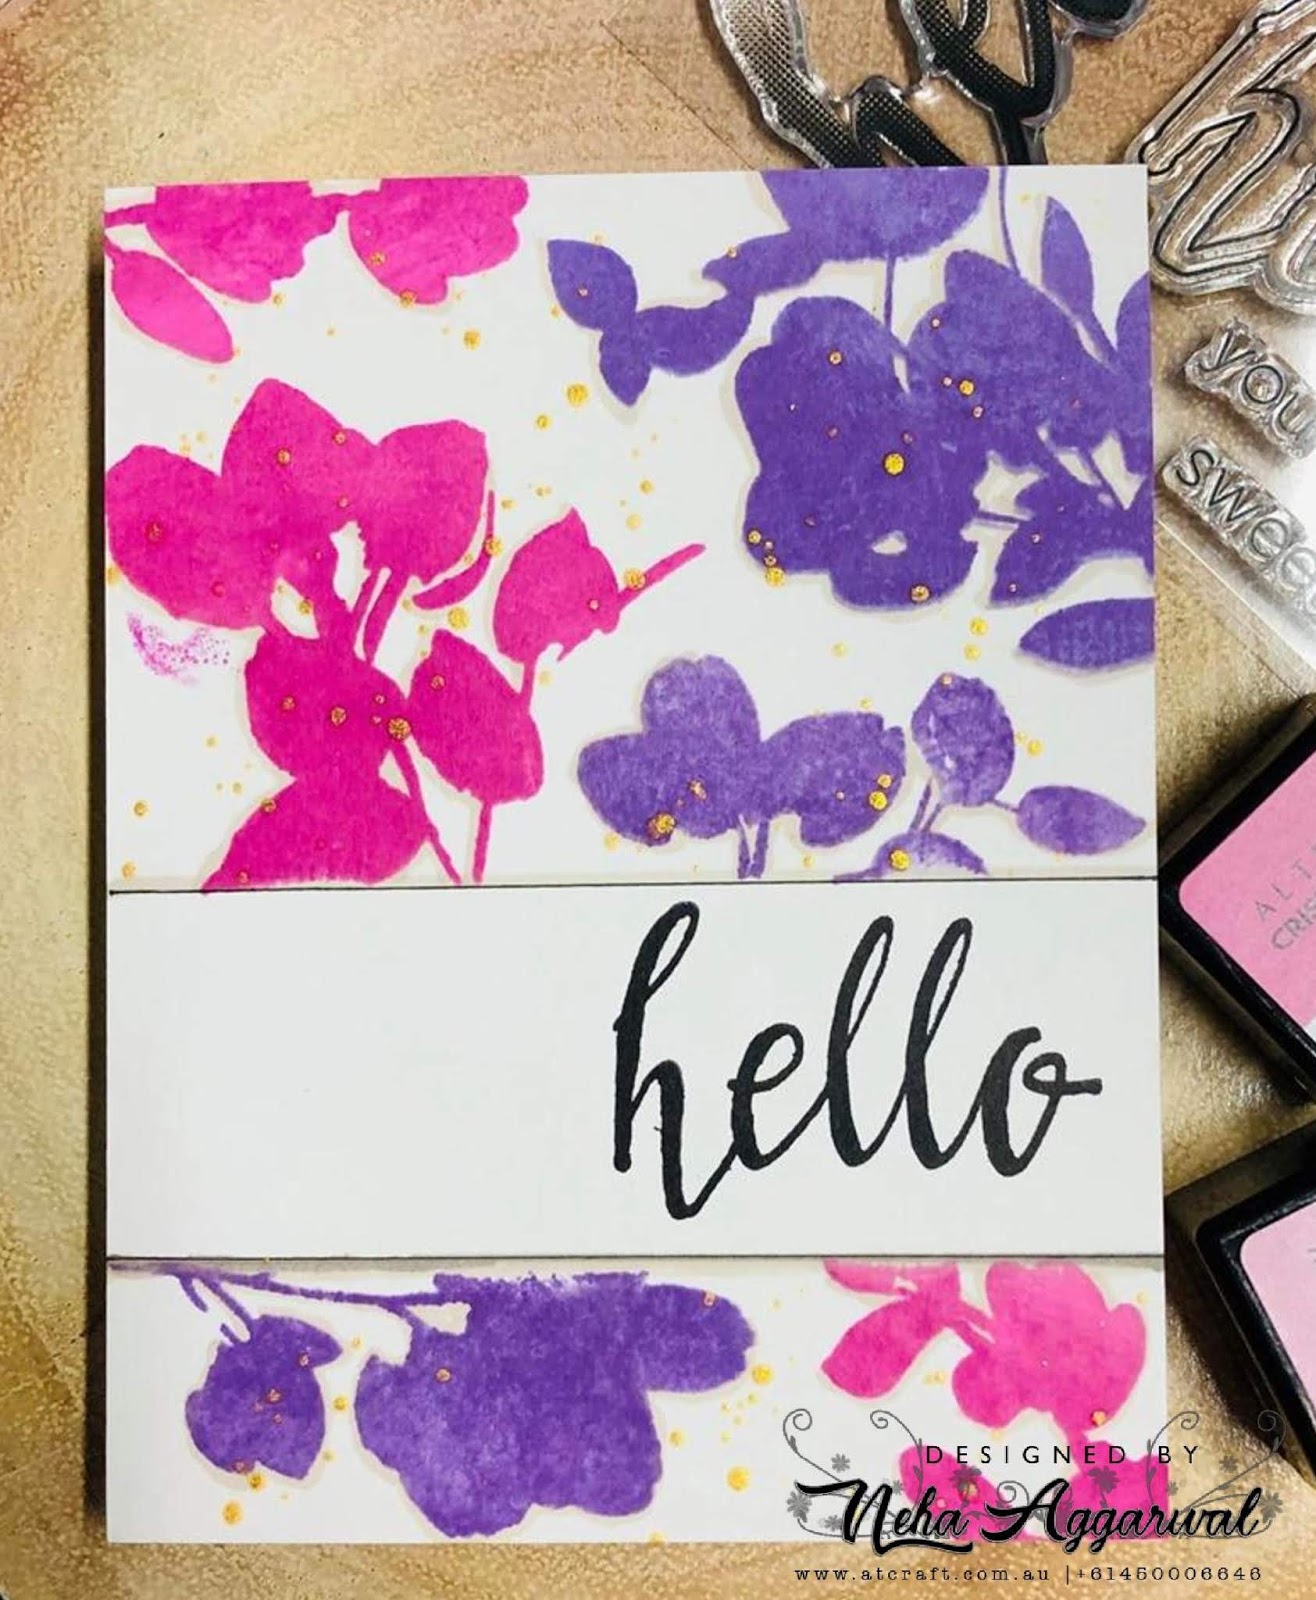
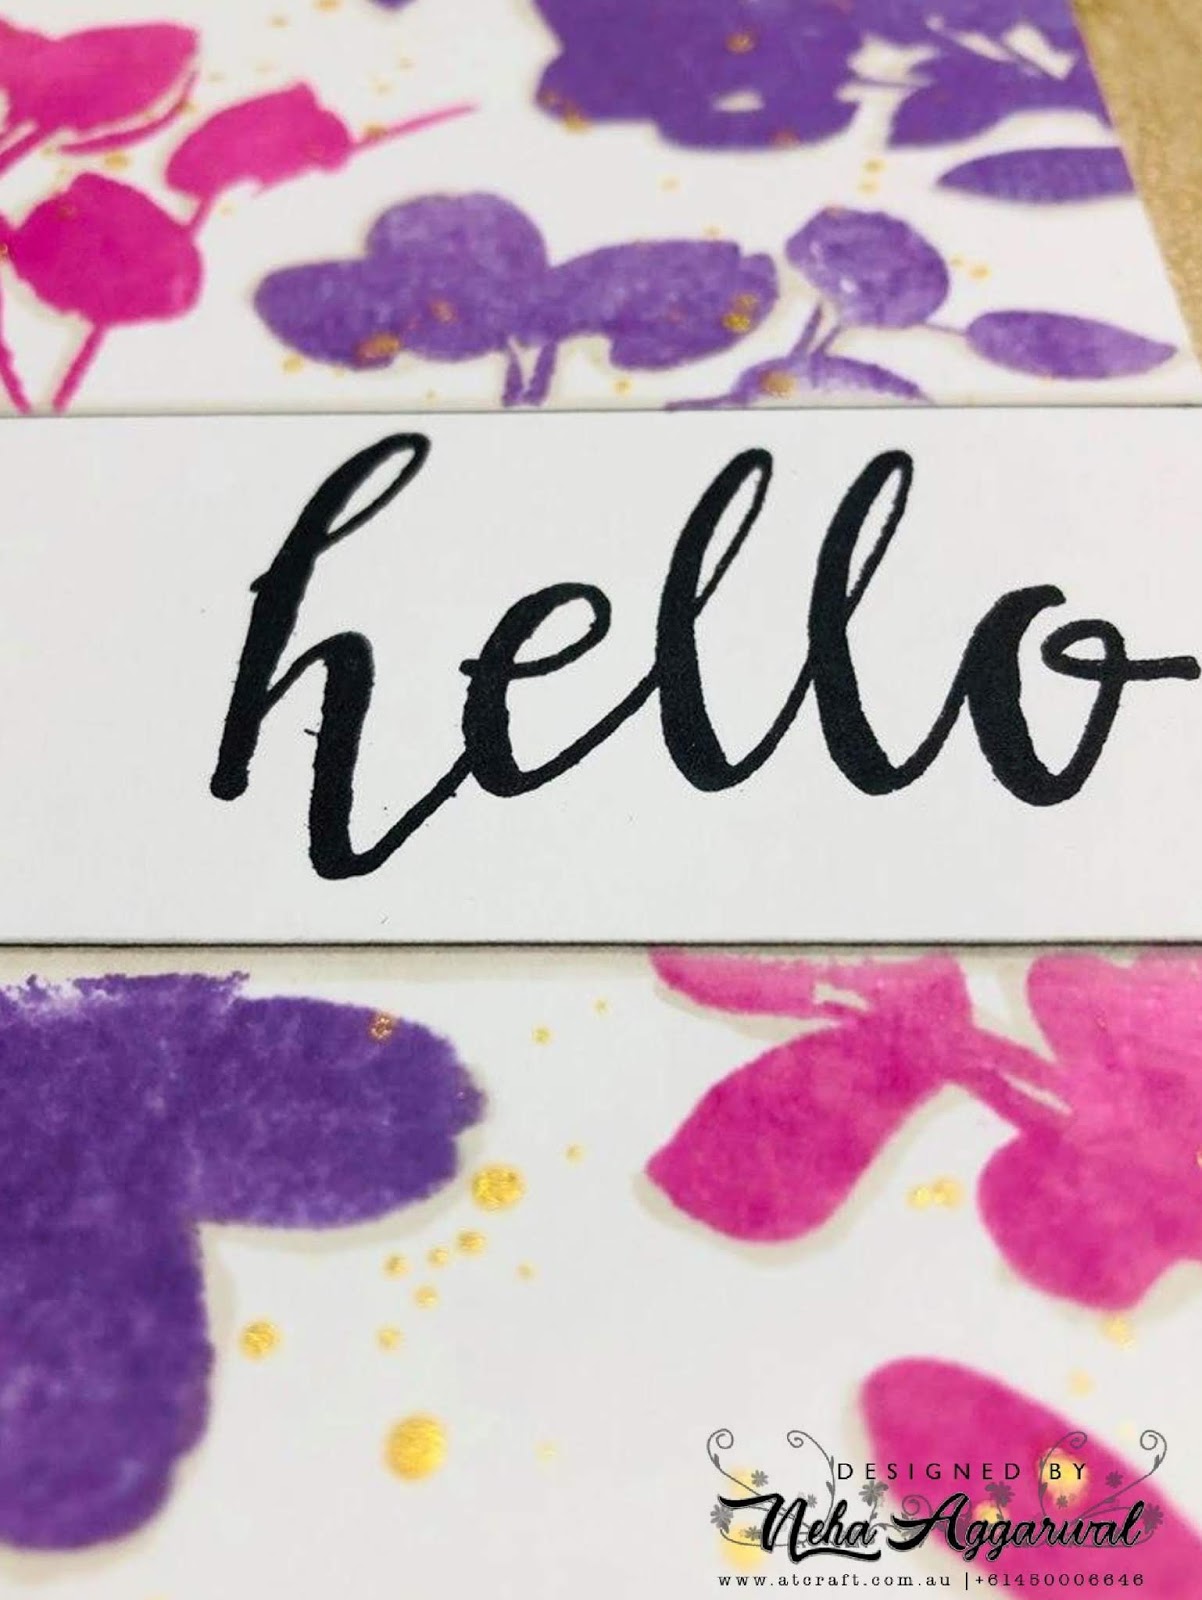
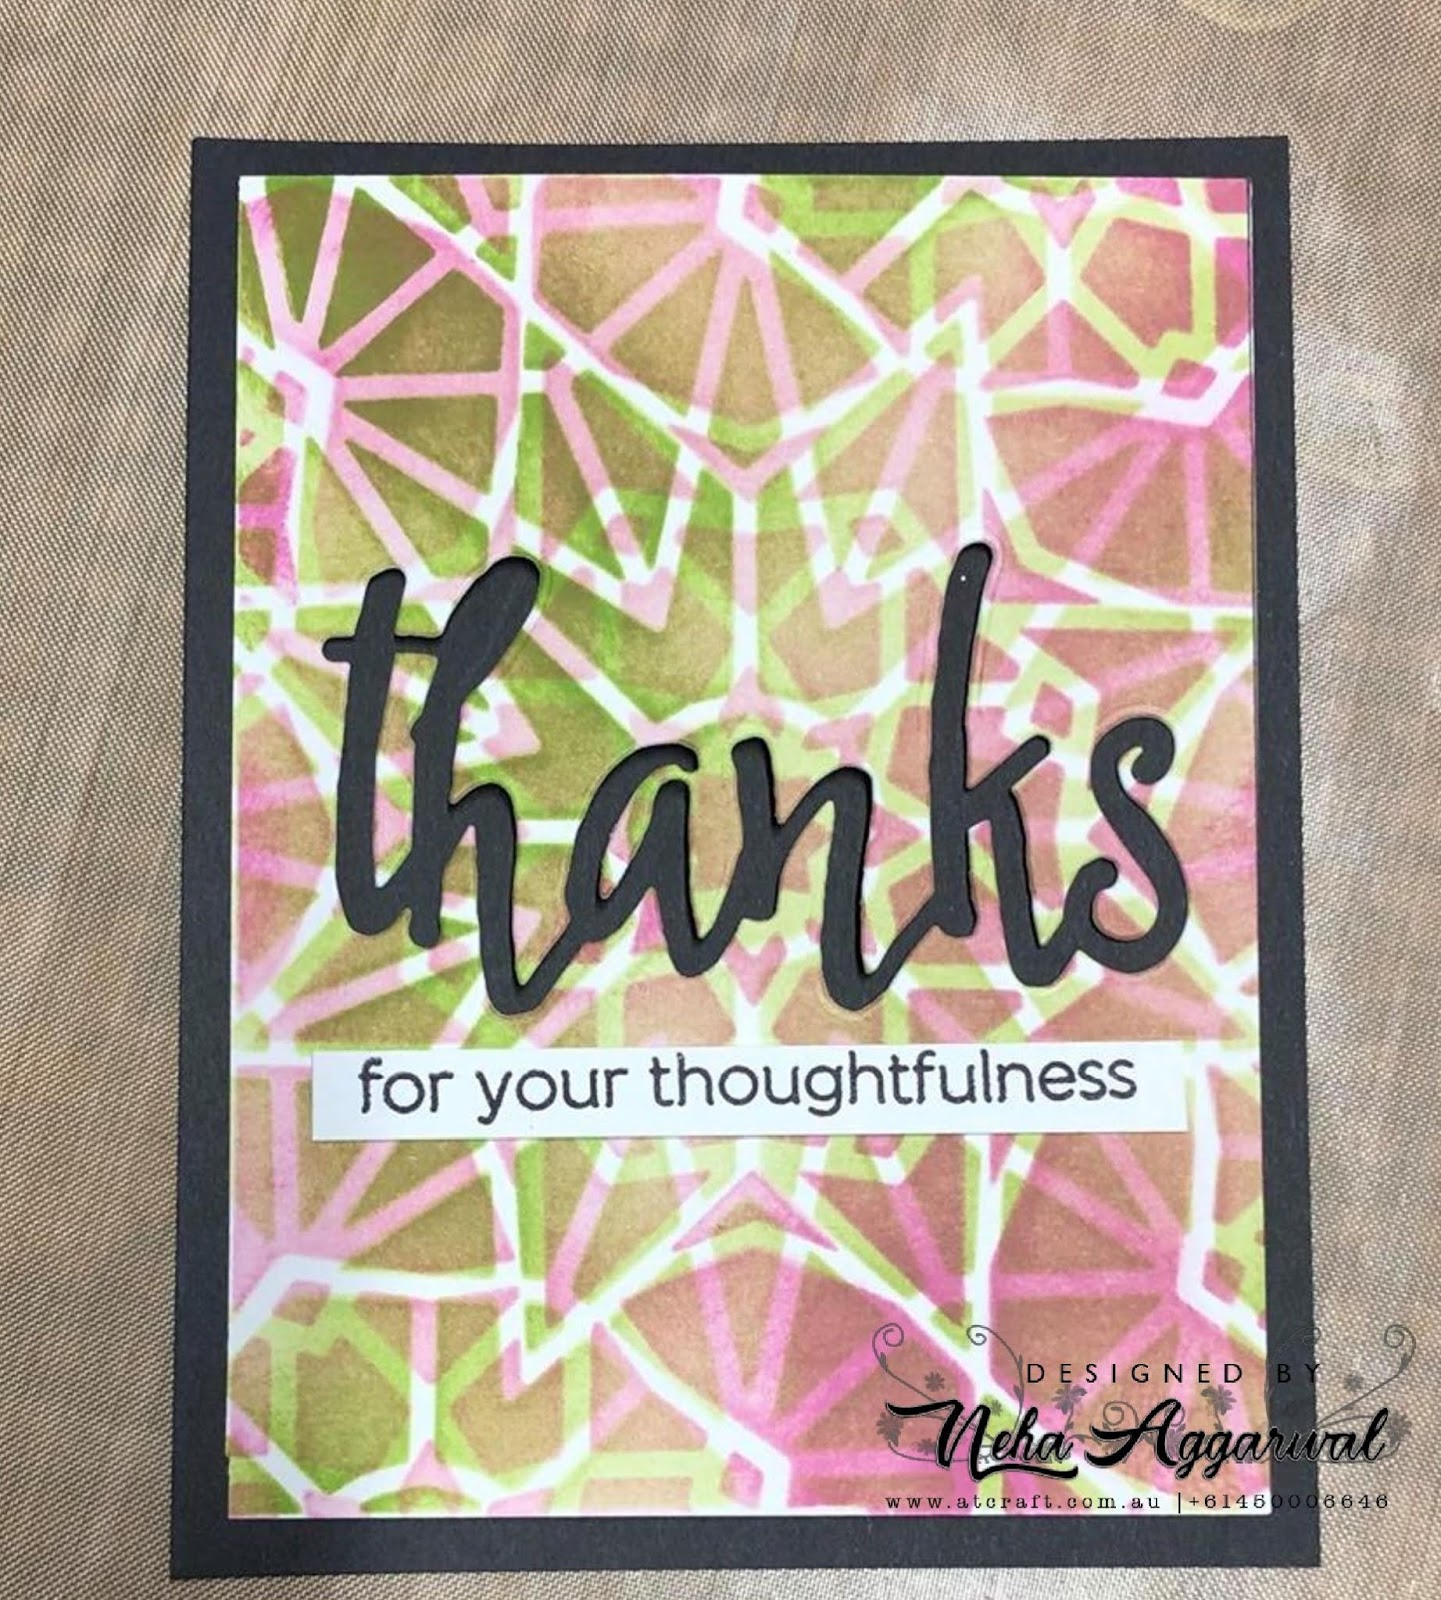
CARD 2:


Material Used:

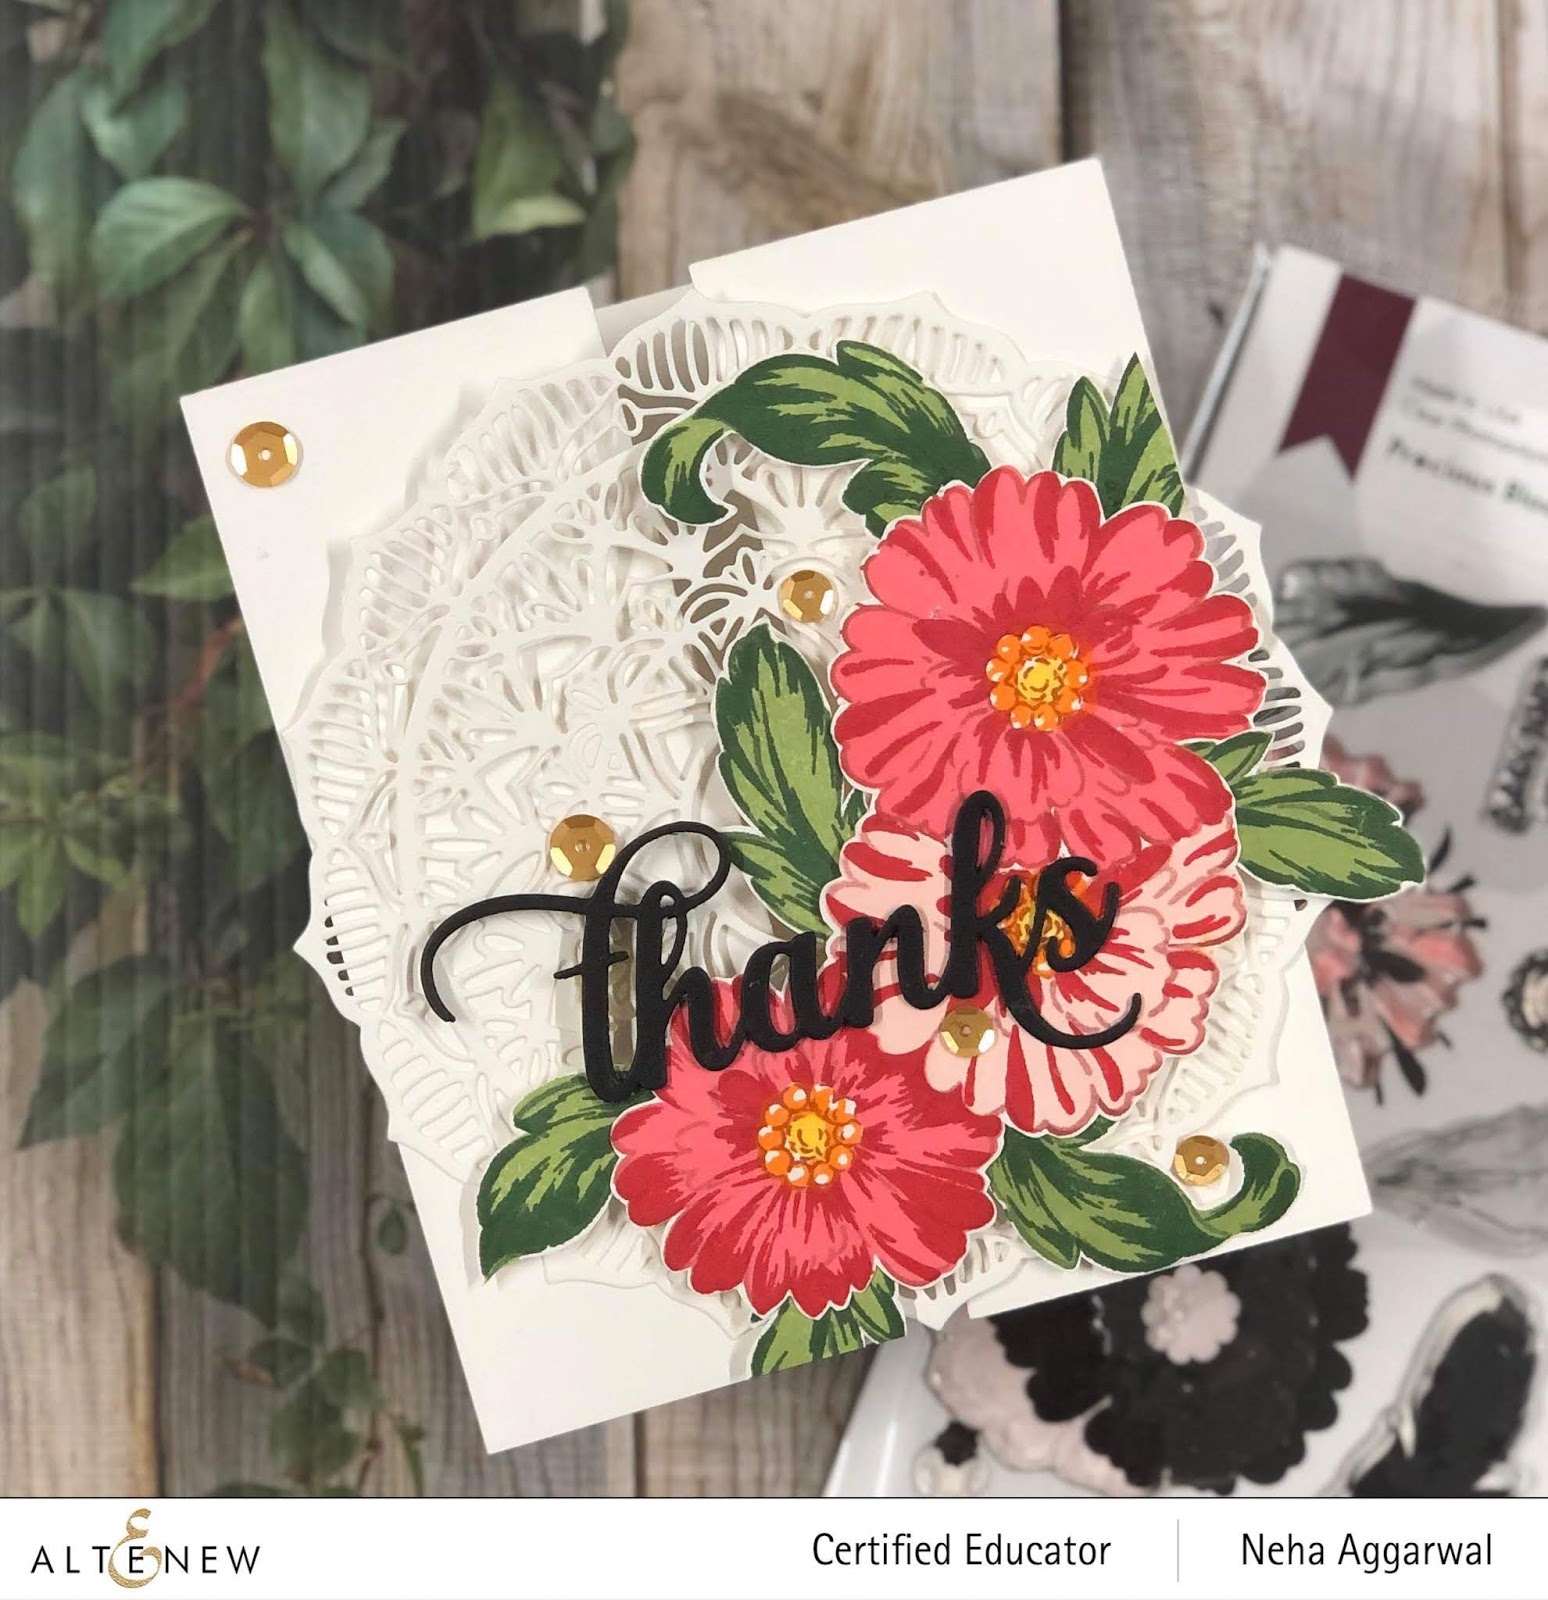
Stamps: Wonderland Stamp, Hello Die and Ornate Cover Die

Background Alcohol Artist Marker Reinker: Midnight Violet and Ruby red

Black Obsidian Ink for stamping my flowers.

Neenah Solar white for my Card base , flower stamping

A piece of gold Foil

YUPO paper Medium weight

Rubbing Alcohol or Blending Solution

Vellum

Steps:

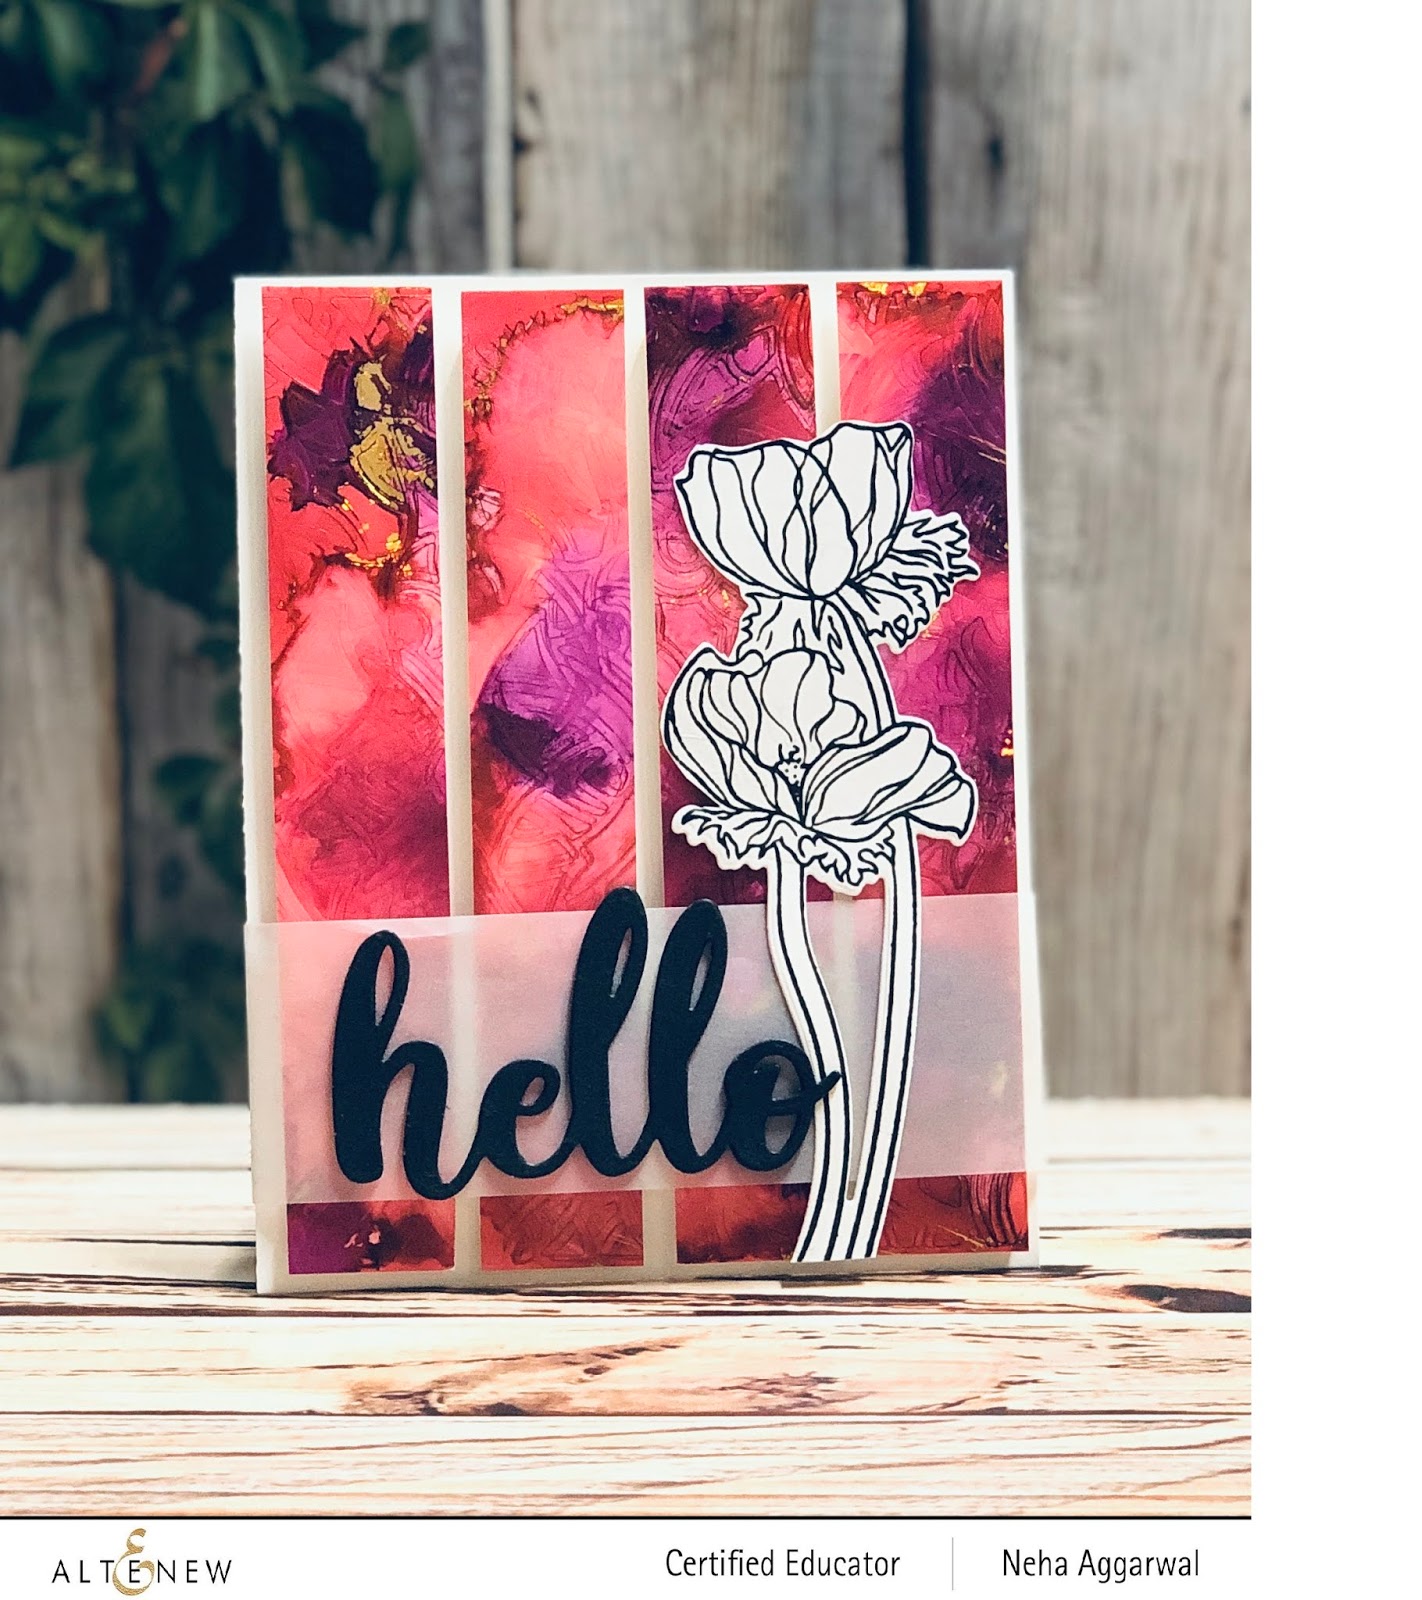
1. In this card first I dry embossed my background with the help of the Ornate Cover die on my Yupo paper. If you don't know how to emboss with a die you can follow Lydia's Video here to see how it can be done.

2. To make the background after doing the embossing I took the alcohol ink and dropped few drops on my same YUPO paper ( measures 4 1/4' by 5 1/2' ) and spread that ink with the help of a straw and also used blending solution to make it more runny across the paper.

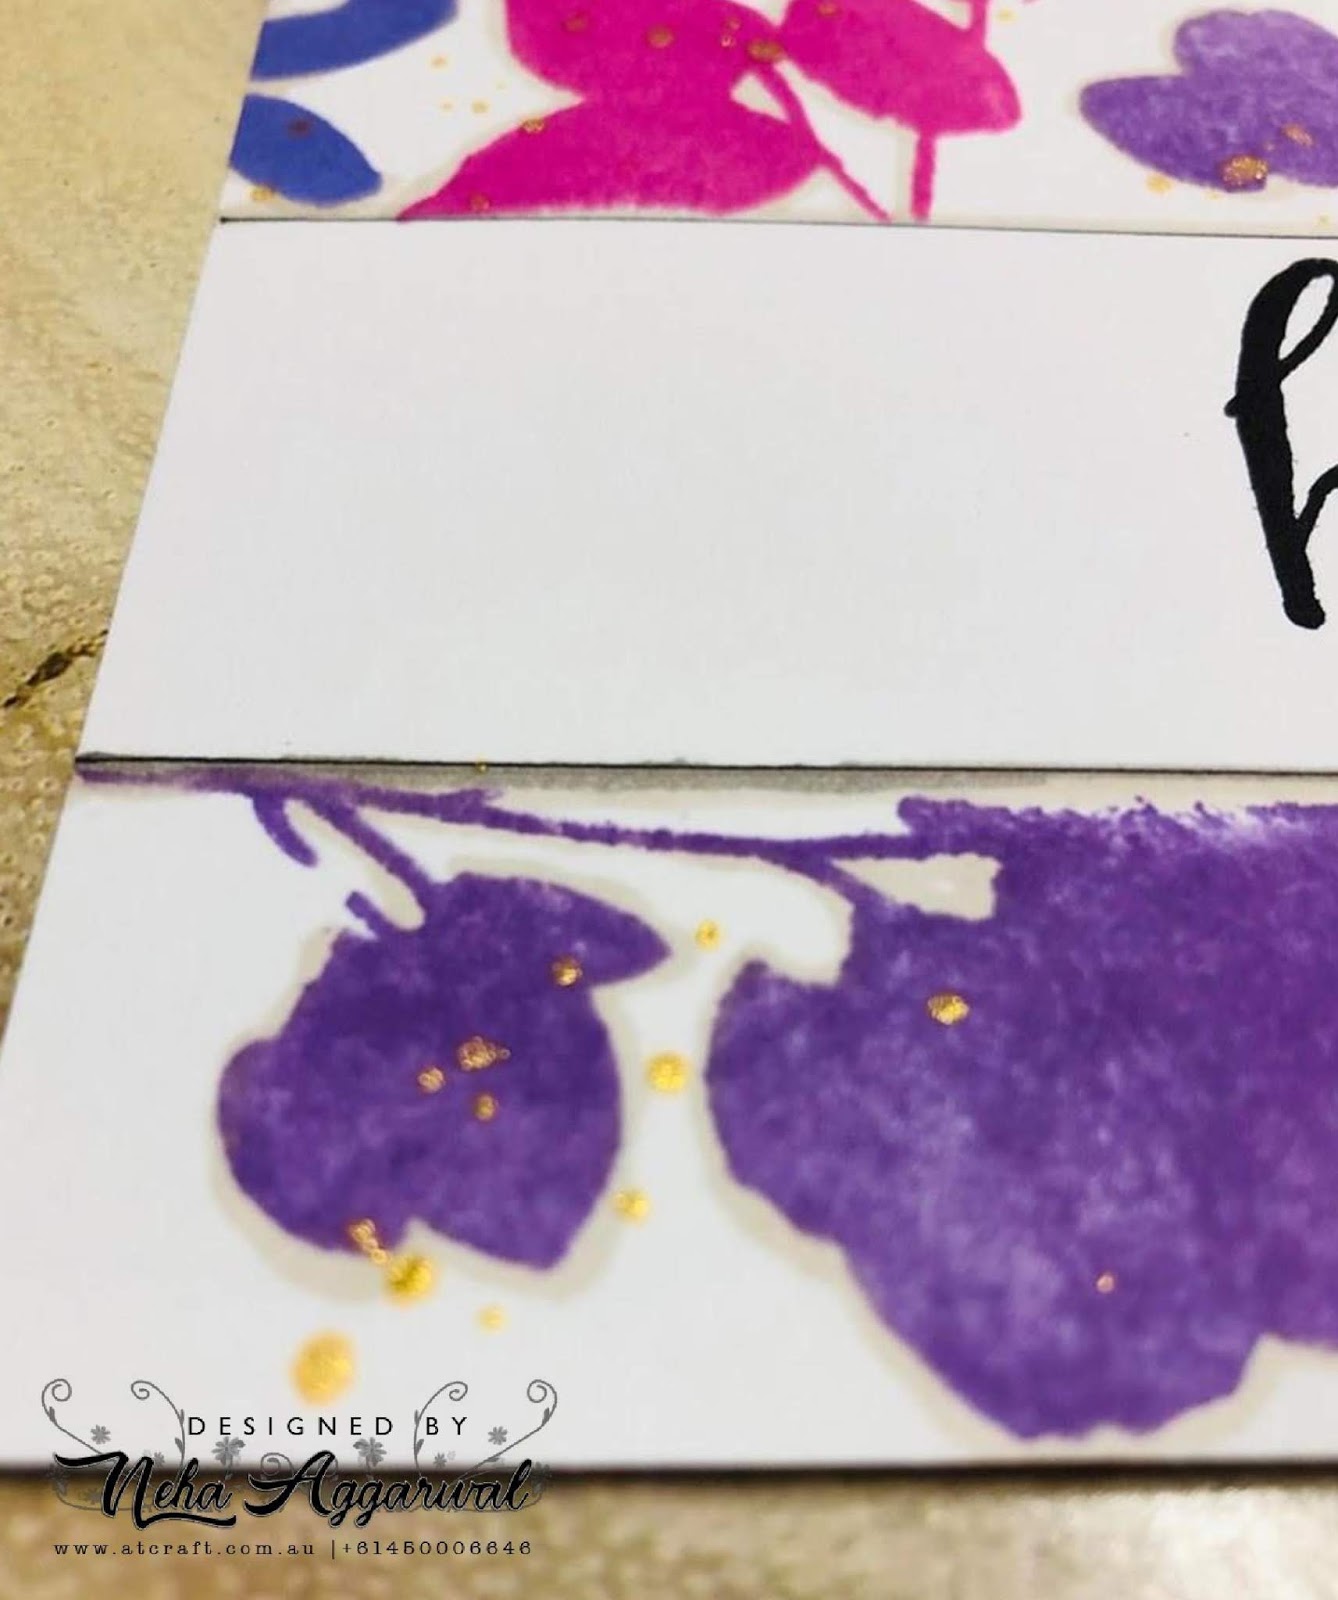
3. Once the background was little dried , I took a piece of foil and rubbed on the areas which were still wet. Because it being wet the foil got stuck to those wet areas.

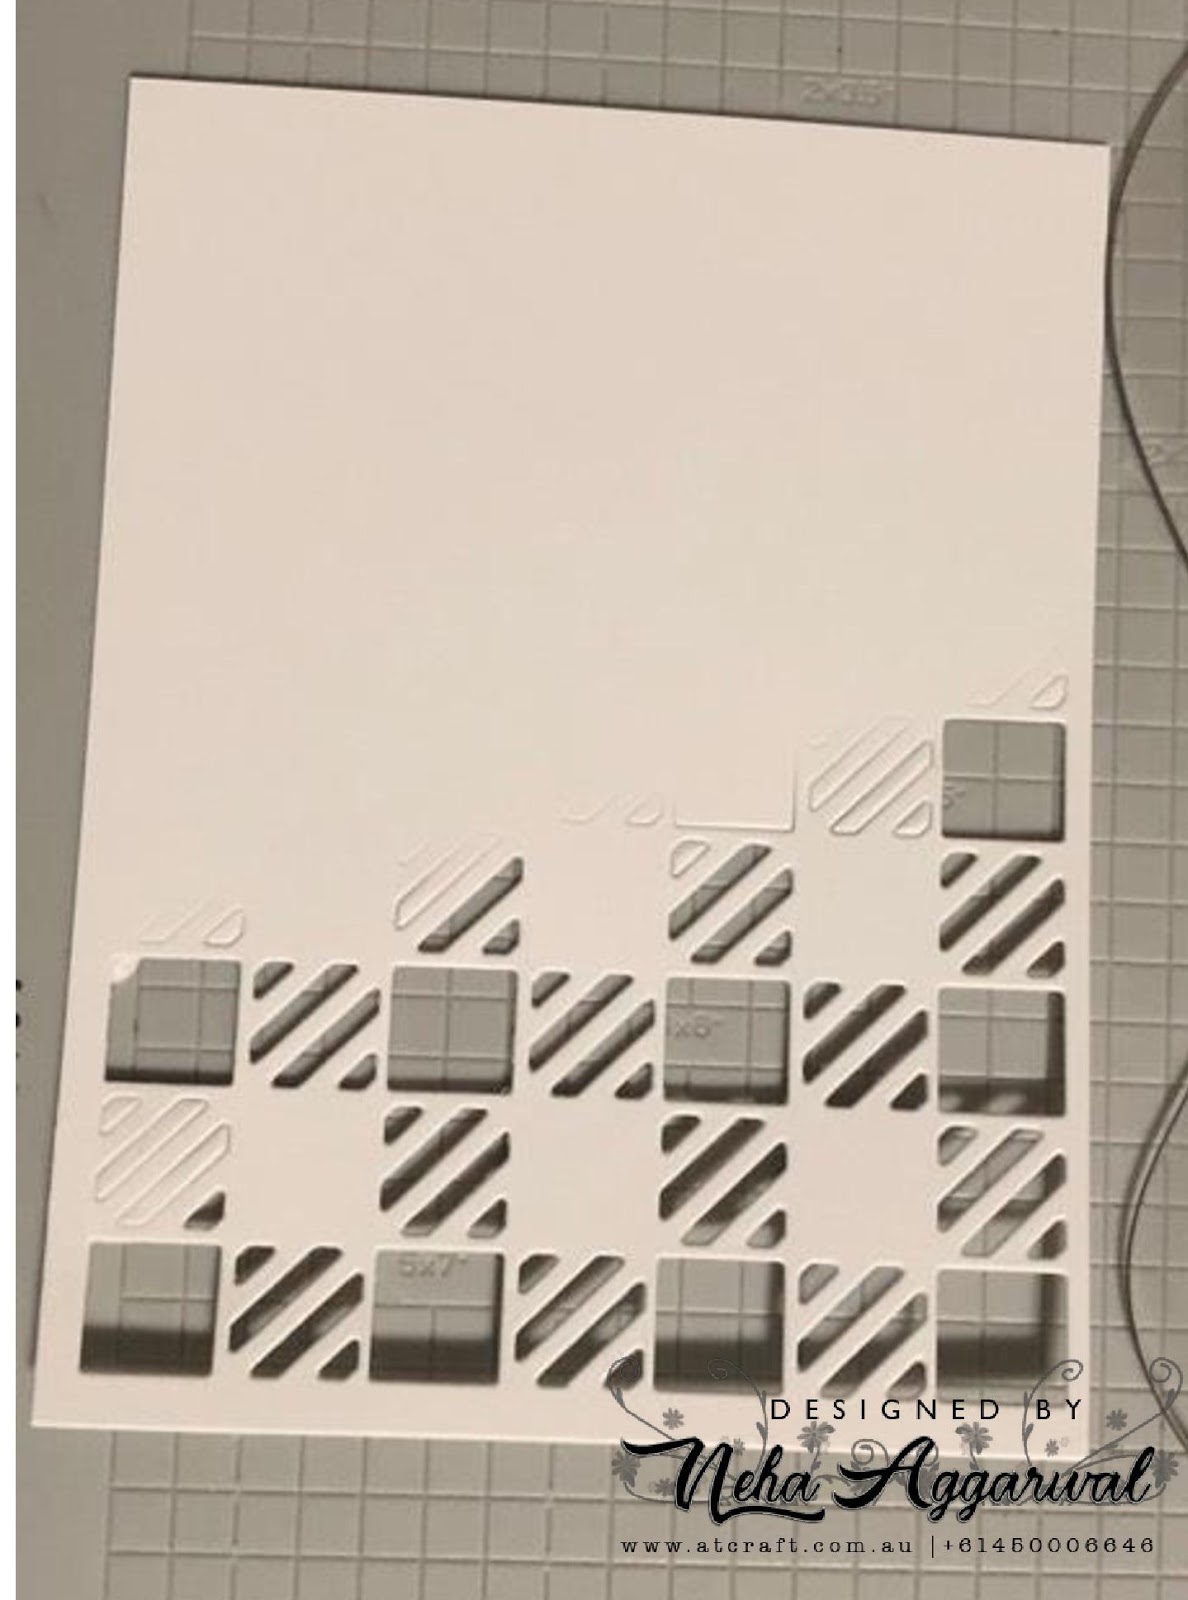
4. After I was happy with my background I cut that out in four equal parts and stuck on the neenah white card panel measuring 4 1/4'by 5 1/2' with the help of a foam tape.

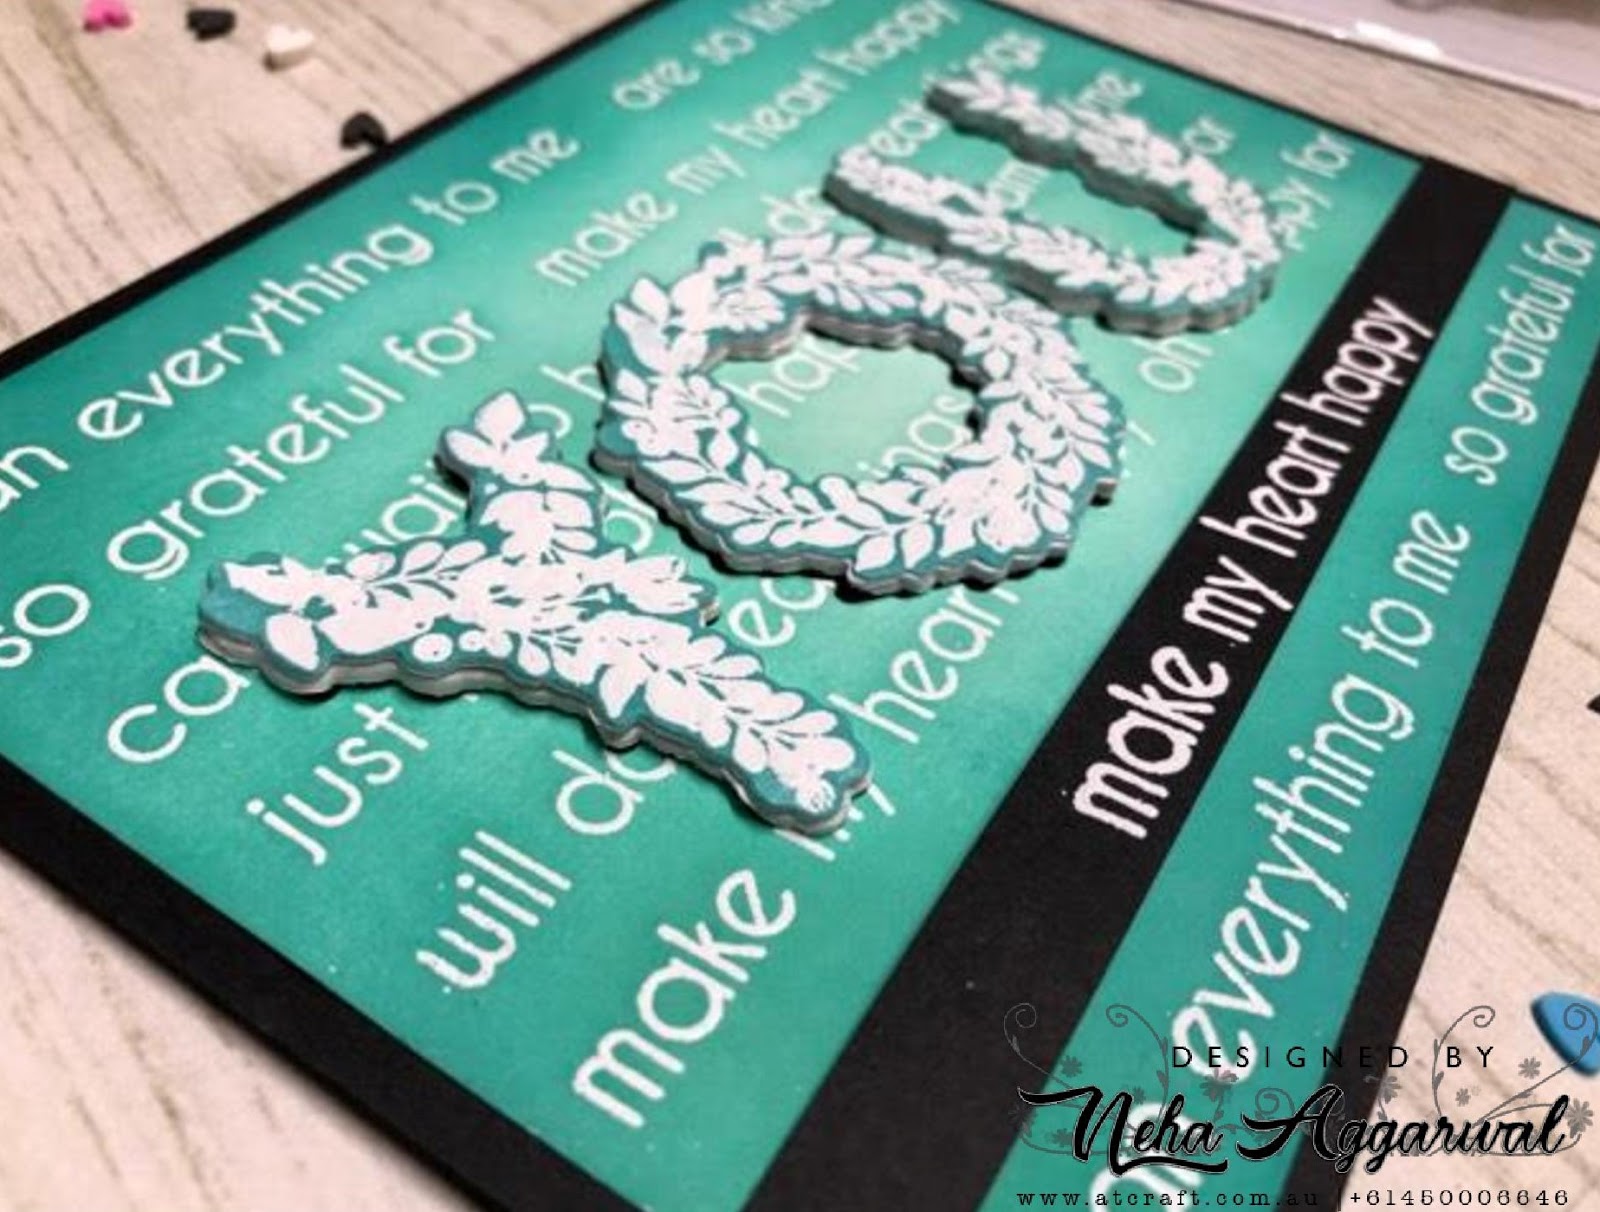
5. For My hello word I die cut three pcs of hello and stuck them together to get dimensions.

6. Because I had a very heavy background so I decided to stamp my flowers black and white . I stamped one of the stamps from the wonderland stamp with Black obsidian on Neenah Solar white paper.

7. After finishing all stamping I first put a piece of vellum on the bottom of the card following the 2/3rd rule. Then I placed my sentiment die cut on it along with the stamped flower image to finish off my card.

Hope you all liked the way they turned out. Please do not forget to leave me a comment if you like my creation.

Prize info:

Altenew is giving away a $30 gift certificate to 3 lucky winners! Please leave a comment here on the Altenew Card Blog by 3/11/2020 for a chance to win. We’ll also draw a winner to receive a $15 gift certificate from the comments left on each designer’s blog on the blog hop list below. All winners will be announced on the Altenew Card Blog on 3/14/2020.

There’s MORE! We will pick 2 of our favorite handmade creations from those who joined the linky party and they will each receive a $15 gift certificate to our store!

Special offer: Save 15% off on ALL Stamp & Die Bundles from 3/5/2020 at 12:01 AM EST until 3/6/2020 at 11:59 PM EST. https://altenew.com/collections/stamp-die-bundles No code needed to enjoy this sale! Not valid on previous purchases. Excludes February 2020 release products.

SHOP HERE: https://altenew.com/collections/stamp-die-bundles

At present you were with me , Neha Aggarwal. You can now go to the Next Educator's Blog which you can find from the List below.

Altenew Card Blog

Michelle Ochoa Murray

Nandini Karmarkar

Terri Marie Koszler

Irina Fonina

Amy Hill

Vicki Finger

Laurel Beard

Teri Stokes

Neha Aggarwal

Nenette S. Madero

Nancy McClelland

Eva Bussom

Amber Rain Davis

Rosie Neustaedter

Patty Mello

Helen Kalb

Teri Wilson

Christine Pennington

Maryam Sharara

Nicole Watt

Virginia Lu

Thank you for Stopping By

Neha

Read more
Embossing Folder Cards and Few Backgrounds

Embossing Folder Cards and Few Backgrounds

Hello Card makers and Bloggers
Its been a long time since I wrote my last blog. Was so busy after my Altenew Educator Program which I cleared in July. Yes you heard me right !! Finally I am a FIRST Australian Certified educator for Altenew . Yahoo!! I am very excited.
Now coming back to the topic. This time my blog is not about Altenew creation. Or you can say I have used some of the products from Altenew like their inks and sentiments to make few of my cards, but I had few Crafters Companions embossing Folders sitting with me so I though lets get some inspirations and spread some inspiration.
I have also followed Jennifer Mcguire for inspirations.
So here are few of the things I made:

I will try and Explain what I did with each of them one by one.
The one I took the Crafters Compaion Indian Summer 3D Embossing Folder and Altenew inks.

The Next one is the Crafts Companion Floral Fusion Along with Finnabair Metalic wax and Altenew Ink.

This one is just on white with Flourishing Frames

Trust me this was white paper and I have used crafters Companion Zen Garden , Redesign Wax along with picket fence blending brush

The Next one is my favorite and this Embossing folder is In the Garden

Spreading some love with Love Blossom

Now coming onto come cards which I have created

You can see the cards which I have made are with some of the folders which I have shown above. The Sentiments used on the cards are from Altenew.
Hope you all like it.
Thanks

neha

Read more

Quick Gift Idea

Are you looking to make something quick this Christmas . Have you tried Magic Shrink Wraps. You can make lots of beautiful things. Here is a quick Video for all you to watch. And you can head over to our shop to get some too.

https://youtu.be/Zt7Ave0ifWY

You can Shop them here . They come in three sizes to choose from .https://atcraft.com.au/product-category/magic-shrink-wraps/

Read more
Altenew Final Challenge for the completion of Educator Program

Altenew Final Challenge for the completion of Educator Program

Wow! What an amazing Journey I had which I started from July 2018 and now here I am, completed my 25 great tutorials with absolutely amazing teachers from Altenew.
Before I go ahead and share my last Altenew Educator program post, I would firstly like to present a BIG THANK YOU to Virginia Lu and Erum Tasneem, who have been wonderful support throughout my Journey in Altenew Educator Program. They have guided me in every project I submitted, correcting me where ever I was wrong which helped me in just overall improvements. And last but not the least, Thank you to Altenew LLC and their team for giving me this opportunity to enroll myself and improve my work with their products for this Educator Program initiative.
And now back to my project. For my last challenge here are few points which I had to do and keep in mind.
· Teach a 2-hour class in a classroom or workshop setting
· There must be 4-10 students in attendance at the workshop.
· Pre-workshop: planning and details of the workshop.
· During the workshop: Google Hangout with Altenew team members.
· Post-Workshop: report of the workshop, classroom projects and reflection on the class.
To fulfill my above requirements I organised my class on 21st June 2019 and 29th June 2019 at my store Auzz Trinklets N Krafts. I gathered few of my regular customers to conduct this Class, where I taught them 3 different types of Card.
Below are the cards which I taught them during the session

Card 1:

Materials for the card used:

  • · White base cardstock 8 ½’x 11
  • · Black cardstock 4 ¼’ x 5 ½’
  • · White cardstock 4’ x 5 ¼’
  • · Climbing Clematis Flower and Leaf stamped die cuts
  • · Warm and Cozy , Golden sunset , Pocketful of sunshine and Greenfields Mini ink cubes
  • · A piece of vellum
  • · Couple of sequins
  • · Cozy Flannel Cover Die
  • · Coffee Break Mini ink cube set
  • · Altenew Antique Gold Pigment Ink pad
  • · Black colour from Altenew Watercolour Palette
  • · Splatter Brush
  • · Glue, tape and Scissors.
  • · Glad Press N Seal
  • · Black Permanent Ink Pad
  • · MISTI

Focus for the Class:

  • · Let it shine : how to put embellishments or bling and Splatter
  • · All about layering : how to Layer your flowers and following the guide
  • · Partial die cutting; Using your die cover dies in for partial die cutting.

How to Make the Card:

  • Take a Back piece of cardstock and stick the partial cut cover cardstock which is shown in the picture.
  • Now splatter few black drops on the partial cover die using the Altenew Watercolour Palette and splatter brush.
  • I stamp all my flowers and leaf using the layering guide which was provided on the back of the Climbing Clematis stamp. I have used mini ink cubes: warm and cozy, Golden sunset and Pocketful of sunshine for flowers, for leaves I have used Green Field.
  • Start arranging your flowers as you like. Below I took two ways of arranging them. Once I was satisfied with my arrangement I headed over to my next step.
  • In order to have the same arrangements I used Jennifer Maguire’s Press N Seal technique where I took a piece and stuck that on my layered flowers until they are all temporary stuck on it.
  • Gently removing them from the base I applied glue on the flowers which I wanted to be stuck down and foam tape on the raised flowers and leaves. And then I took it back the way I lifted it, to have it placed the same I initially desired.
  • I used the sentiments from the same stamp set and stamped in on the Vellum strip and then adhered it on the card base as well keeping in mind the 1/3rd rule.
  • To finish the card I stuck few sequins following the trick of putting them in triangle and also odd numbers which I learned in the class “Let it shine”.

Card 2:

Materials for the card used:

  • White base cardstock 8 ½’x 11
  • White cardstock 4 ¼’ x 5 ½’
  • Shades of Purple Ink pad
  • Spring Bouquet 6 mini Ink cube pads.
  • Black Permanent Ink pad
  • Micron 01 pen
  • A study in Watercolour Stamp set
  • Baby Wipes
  • Altenew Tape runner
  • Altenew Antique Gold Spray
  • Altenew Halftone Hello Stamp
  • Extra piece of Cardstock for masking the area for sentiment.
  • Altenew Evening Grey and morning frost Artist Markers

Focus for the Class:

  • Let it shine : how you can Use Altenew Spays.
  • One Layer Wonder : how to keep your card to Minimal layer and yet they look beautiful
  • Basic masking: Simple masking technique used for sentiment.
  • All about layering: How can solid stamps be layered.

How to Make the Card:

  • First mask the area which will be used for stamping the sentiment. I had used a piece of rough paper to mask the area.
  • Now placing my stamps where I needed on the Neenah cardstock 4 ¼’ x 5 ½’ and stamped the different stamps with the inks from Shades of Purple and spring bouquet pink shades. I used two shades from each colour family.
  • First I stamped with the lighter colour. Now daube darker colour on the same stamp ( do not stamp yet) , using baby wipes I took off some of the ink from the sides giving it like a shaded effect and then stamped over the lighter stamped area.
  • Once I completed my stamping, I removed paper from the masked area and with the help of T ruler I drew two lines with the Micron pen.
  • I took My Artist maker evening grey first and made scribbles along the top and bottom line where I wanted the sentiments. Then I did the same thing with my Morning frost Artist marker too. (This gave the look of having a paper on top of the base for Sentiment).
  • I also did a little bit of shadow effect on the stamped flower and petals with morning frost Artist marker. I kept in mind my light and shade areas before putting my shadows.
  • Once this was all done I went ahead and stamped the sentiment on the side by using the word “hello” from Halftone Hello.
  • To finish this card I splattered some Antique Gold from Altenew Spray. While I did this I masked my sentiment again so that I don’t get any gold splatter on my sentiments.

Card 3:

Materials for the card used:

  • White base cardstock 8 ½’x 11
  • black cardstock 4 ¼’ x 5 ½’
  • White cardstock 4’x 5 ¼’
  • Spring Bouquet 6 mini Ink cube pads.
  • Black Permanent Ink pad
  • Picket fence Blending Brush
  • Halftone Thanks stamp and Dies
  • Baby Wipes
  • Altenew Layered Kaleidoscope A & B
  • Few Water drop embellishments

Focus for the Class:

  • Let it shine : how to put embellishments or bling
  • Easy Die cutting: Using dies for stenciling.
  • Clean and Simple Boutique Cards.
  • Easy Ink Blending.

How to Make the Card:

  • Die cut out the Kaleidoscope layer A and B on a thick cardstock as they will be used for stenciling.
  • Take the white Neenah Card stock 4’ x 5 ¼’ and place your stencil on top of it and position it on your craft mat so that the stencil does not more when doing the blending.
  • I first used fresh lime Ink pad and then Fusia ink with my respective stencils.
  • Once I was happy with the results I then positioned my dies “Thanks” on the center of the card stock and die cut it out.
  • I used the “for your thoughtfulness” from the coordinating stamp set and stamped on the white strip.
  • When I die cut my thanks I managed to save the loose piece which I later on stuck it with the foam tape when I was adhering the rest of my card on the black cardstock.
  • To finish of my card I used few water drops which I had in my stash.

I am so happy for my class for both the days. I was so pleased and thankful to the girls who joined me for the class in learning those three cards. A big thank you to my three coordinators Virginia Lu, Erum and Nicole who gave me their continue support during my both class workshop. I would like to take an opportunity to share few pics of the Workshop which I conducted at my Store.

Pic 1: How I did my preparations for the class. Card Kits

Pic 2: Setup for the Class:

Pic 3: My lovely Students working so hard :

And Final Work from the girls :

Hope you all liked my cards and I love all my lovely students who came to learn those cards from me.
Hope to get more creation done with Altenew and see you all soon here reading my blog posts.

Regards

neha

Read more
Altenew Creative Watercolor Media

Altenew Creative Watercolor Media

Hi Everyone,
Today I am here to show one more project for Altenew. For this purpose I have selected another one of my favorite Class Creative watercolour Media.
For this project I wanted to try and improve my coloring techniques by using the Altenew Watercolour Palette and Altenew Water brush Pens.
I have used the stamp sets Build-A-Flower: Anemone Coronaria and for the sentiment I chose my "happy" word from the Script Words 2. " for you" is from the halftone happy stamp set.

Basic Techniques and Process for making this Card:

  • For making this card , I have used the basic technique of masking.
  • First I planned how many flowers I want on the top and then stamped them randomly on my strathmore Watercolor Paper Cold press using distress ink Antique Linen.
  • Once I have got my top flowers I masked them with the flowers which I got by stamping them on a paper separately and fussy cutting them out as I wanted no white background in the flowers.
  • I have done the same techniques for the leaves as well and masked few to see the over lapping ones coming underneath the flowers.
  • After I was happy with my stamped images I started my coloring process.
  • Foremost I did a brown water wash outside my outline images. So spreading the brown outline with more water.
  • Then slowly and patiently I started doing every alternate petal at a time so that they are not wet as when I do the petal in between the two I did before.
  • For the middle of the flowers I did black dots with watercolor.
  • For a bit of enhancement I also splattered some white with my brush.
  • My sentiment "happy" was cut two times on white card stock and 1 pcs in gold glitter card stock to have a raised effect.
  • "for you" I stamped with the Altenew New Antique Gold Pigment Ink on a black card stock.

Its amazing when you are challenged with something out of your comfort zone and try something new. I really would like to Thank Virginia and Erum for their support and love.
I look forward to create more and present myself more under their beautiful guidance.
Hope you all like it.

Regards

Neha

Read more

Altenew Zentangle for Cardmakers

Zentangle for cardmaker! what an amazing class it was. I have done few cards before with zentangle but never had a chance to finish them. Few tips and tricks learned with Amber Davis at the Altenew Academy was just on spot to full fill all needs.
Today I created a card with Zentangle. For this Card I have used the Geometric landscape which is a new release from Altenew. As soon as I saw this stamp I thought this would be perfect to do some zentangle. Along with this stamp I have also used Altenew Henna Element set.
So here I am with my card.

Here is the process on how I have created this card.
First I took a stamp from the Henna element and stamped them in a diagonal pattern on Nina Solar white along with its leaves. On a masking sheet I stamped flowers and leaves to cover the stamped images which I stamped on Nina solar white.

Now comes a bit of tricky part. The stamp was 6x6 so I had to bit struggle and expanding my lines with geometric pattern, I made a boo-boo but with Zentangle everything was hidden. First I stamped the 6x6 Image pattern and then I moved my paper little on right side so that I can stamp the 1/4 of the stamp again .Below is my picture which will show you what exactly I did.

All the lines which went missing from my this image I did create them when I started with my zentangle on it.
Once everything was finished I managed to die cut my sentiment happy cutout 4 times on a back cardstock to layer them on top of each other and used "Birthday" from Birthday builder stamp set.To finish it I just added few bits of sequins to add sparkle to finish.

Hope you all like my card and would love to join Amber for her beautiful class for some more fun and learning.

Untill next time.

happy Blogging

regards

neha

Read more
Altenew as Easy as ABC with Therese Calvird

Altenew as Easy as ABC with Therese Calvird

An amazing month of April started with Altenew class in Melbourne with Tasnim and Therese. Finally I got to meet them in person.
Now coming to my second last lesson for AECP. For this lesson I took Therese Calvird class at the Academy called Easy as ABC.
The Lesson was all about to make the best use of your Alphabet stamp and Dies. With the help of Therese Video here is what I have created.

For this card I have used Botanical You stamp set. And for making the best use of this stamp, I have used all the sentiments which were in this stamp set. Created my background with heat embossing. I have also used the layering word "you" with heat embossing.

After finishing my heat embossing I have used Picket fence Blending brush to do my background . I have used the ink pads from Altenew which are lagoon, Volcano lake, and Mountain Mist.

After completing I die cut out my word 'You' from the base base cardstock as well as the leafy YOU with the help of the coordinating dies. I mounted the leafy YOU with the foam to give extra dimensions so that they look like popped out from the base.

To finish my card I added a strip of sentiment heat embossed again on a black strip.
Hoping to finish my last lessons soon with my AECP.
Regards

neha

Read more

Watercolor Basics & Beyond using my watercolour Pan as Ink

Welcome back to my blog.
Today, I am sharing another technique which I learned from Jennifer Rzasa. Absolutely amazing technique. In this one I have used my pan colours as my inks and spritzing with water before stamping. The results are really beautiful.

For this card , I used the stamp set called Dainty bouquet stamp. First taking the big stamp on my acrylic block and using the teal colour along with the waterbrush pen I applied it on my stamps. TIP: make sure when you are lifting the colour it should not be watery otherwise it will get smudged when stamped therefore it should have lot of pigment in it.
Once I finished doing with my large one . I placed the big one in such a way that they look like one stem and did all the same step as the first one.
Once I applied the colour I sprayed a bit of water on it so that the dry colours are all reactivated.

Now with the layering of just the flowers I have used the second medium and darker teal from my ink pads to have their layers stamped on top of each other.

For my sentiments I have used it from Build-A- Flower camellia with a jet black ink. Also a bit of splatter with black was done to finish the card.
Hope you all like it.

Don't forget to leave me some comments.

regards

neha

Read more
Creating background magic with Altenew Background stamps

Creating background magic with Altenew Background stamps

I am once again back this month with my another step towards my AECP course Completion.
Today I have created a card using the Altenew background Stamp Pinstripe. For this wonderful technique I would like to give credit to the awesome lady Laurel Beard for sharing her knowledge through her class about using background stamps in different forms.
Here is my card.

For making this card I have used a piece of Vellum where I stamped with my Pinstrip Stamp using versafine and white embossing powered. Now here is a trick I rotated the same stamp 90 degree and stamped again using versamark and white embossing powder. ( Since it was already stamped and embossed once so i have few blank spaces in between which added extra features to it when I heat embossed it again.)

Once the embossing is cooled down I used my Altenew Artist markers Mango Smootie and Ruby red on the embossed side of the vellum ( I know I have also used a blue but later on I did not like how blue turned so I cut that out from my final card view LOL ) . Once all colored I took rubbing alcohol in my spray bottle and sprayed onto the vellum which is why you can see in the picture it was bit curled. Then to get the final picture I trimmed out the blue and got this mat on a back cardstock to put them on a neenah solar white card base.

For My sentiments I have cut out word happy ( Scripty word 2 ) on a foam and also on a white cardstock. And my birthday stamp is heat embossed with white from Birthday Builder Stamps.

Hope you all like the card. Please do not forget to leave me your beautiful comments.

Regards

neha

Read more
93 results